5-step simple manual that will guide you through the complete setup of your Toggle-equipped Terrain Command III Controller.
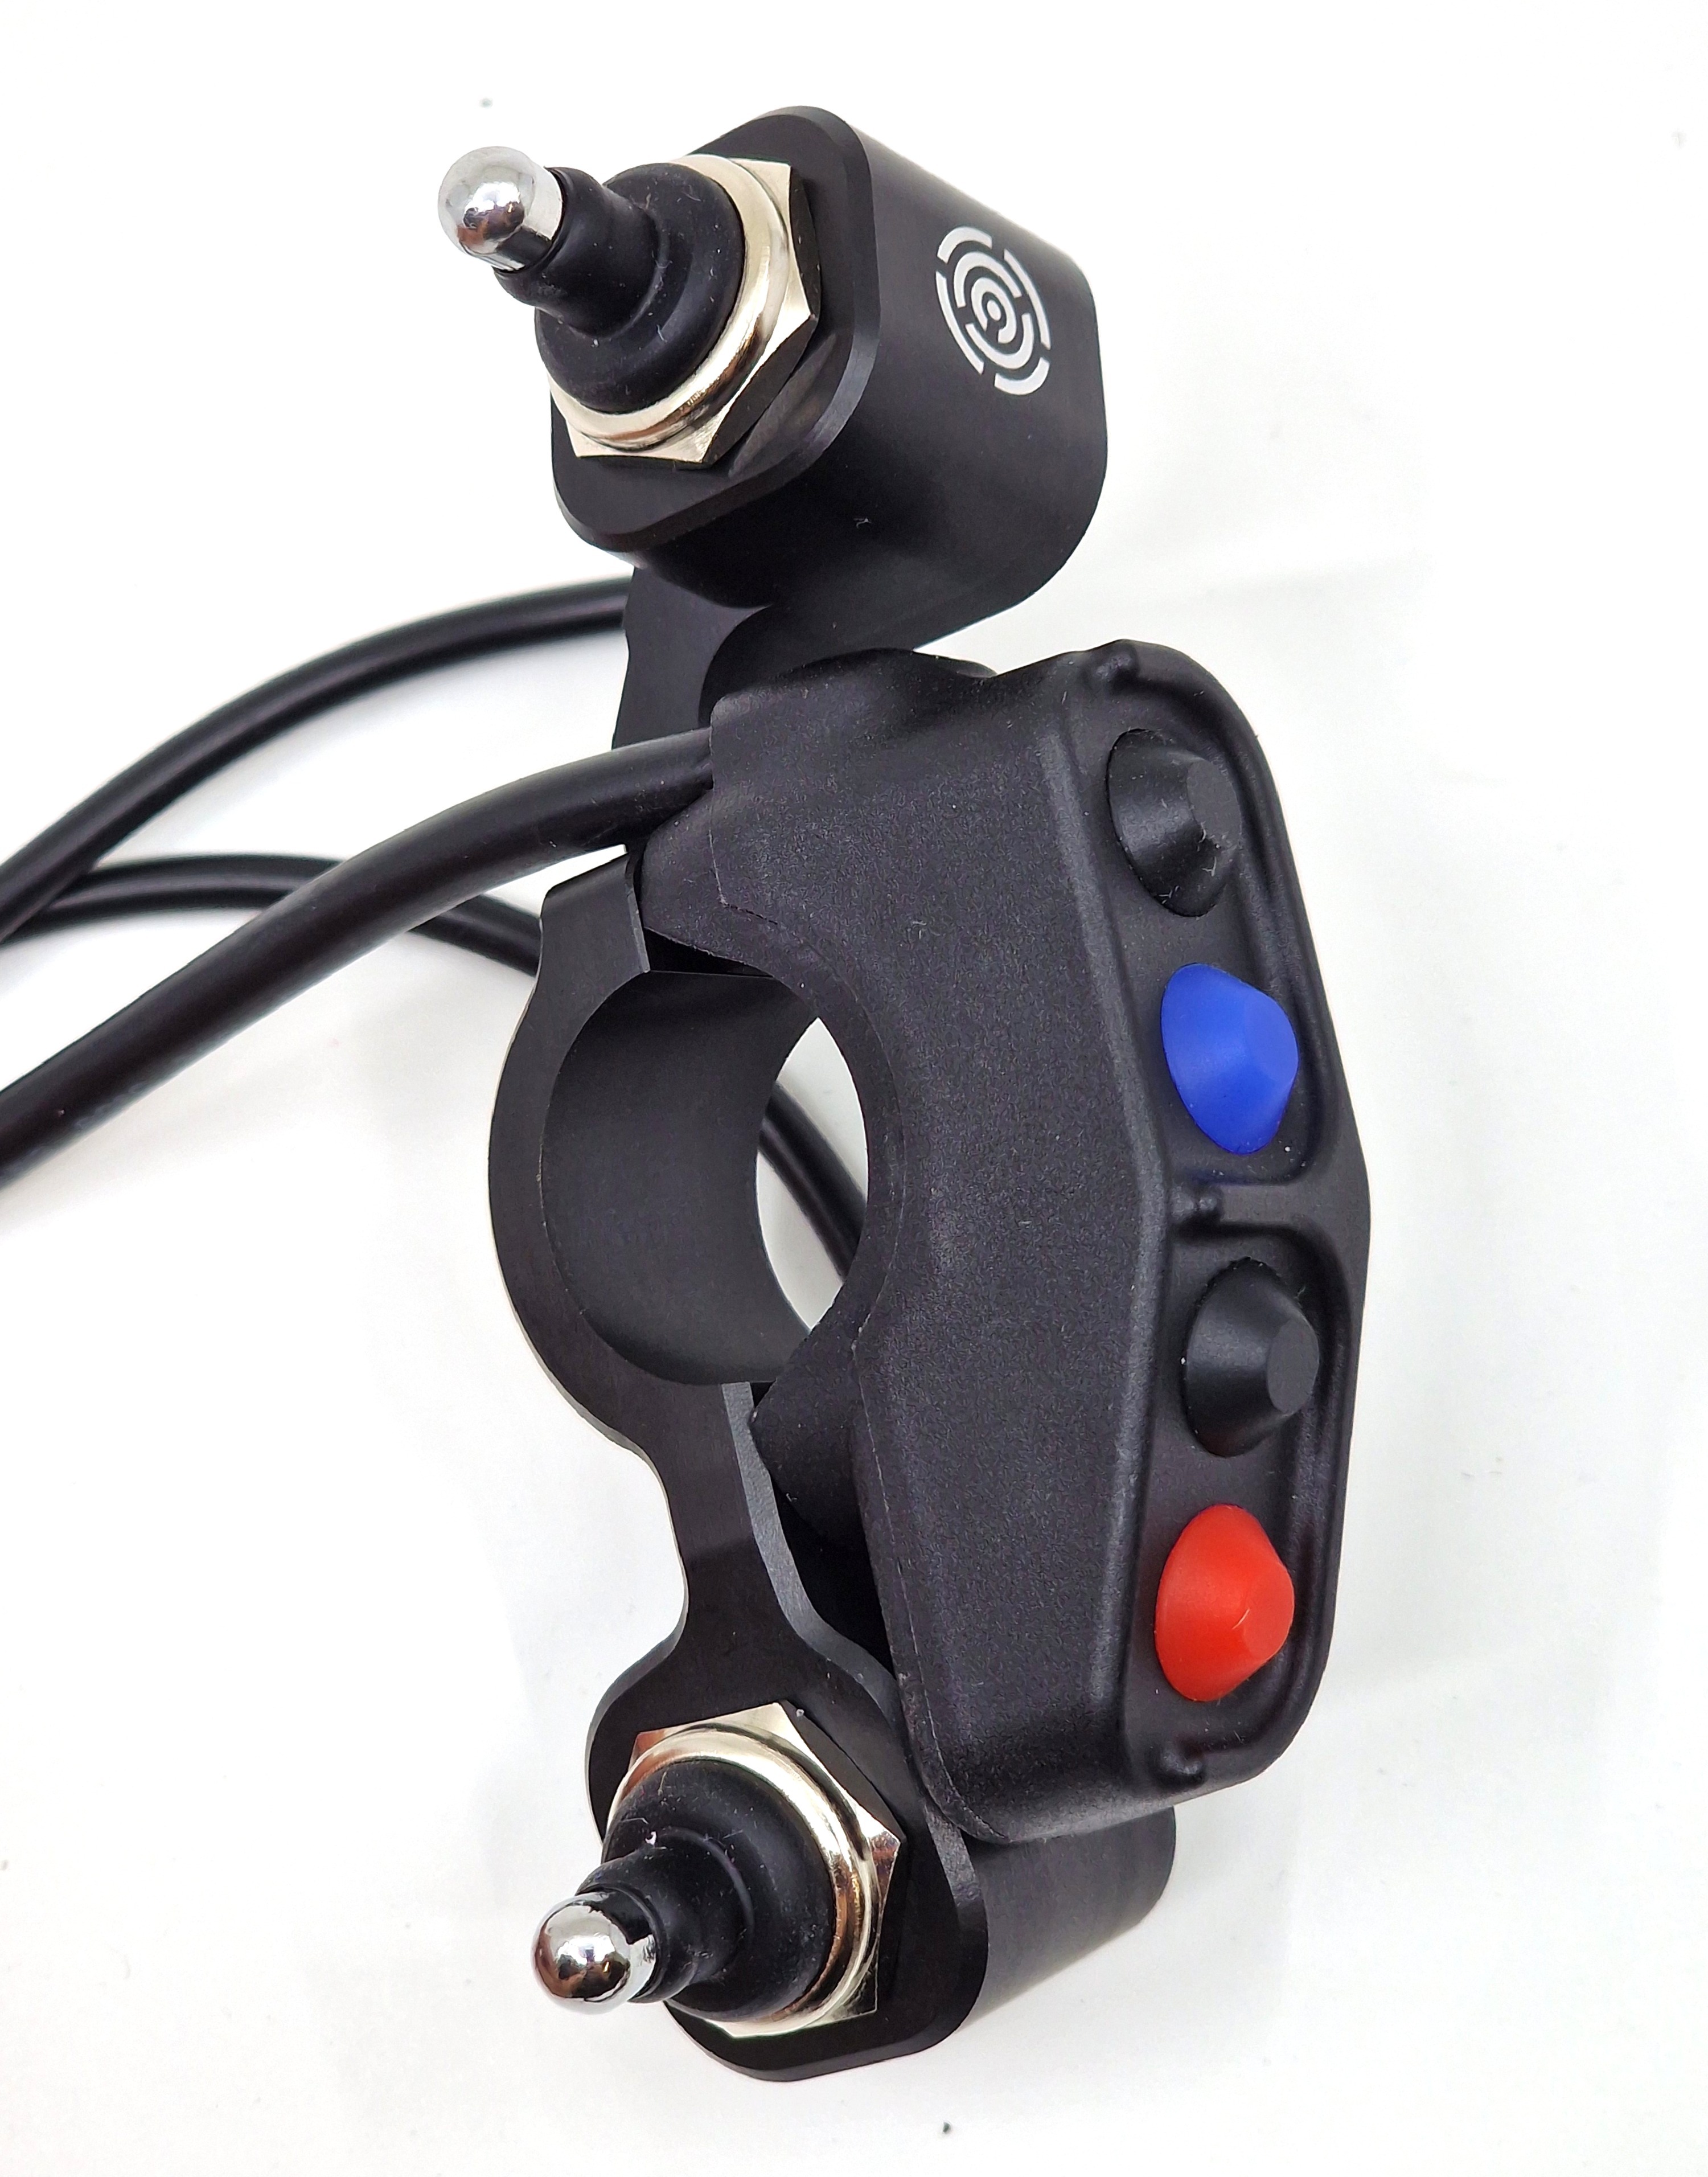
TABLE OF CONTENTS
- 1. Wiring of the Terrain Command HUB
- 2. Fitting to the handlebars
- 3. Connecting it together
- 4. Wireless connection
- 5. Button configuration
1. Wiring of the Terrain Command HUB
First step is to connect your Terrain Command HUB to your motorcycle's power outlet. Connect it to the ignition switched 12V power outlet exclusively. The LED on the HUB will indicate the power delivery to the controller. Make sure to tape the connectors to avoid short-circuit.
2. Fitting to the handlebars
Now it's time to assemble the toggle swith controller and fit it to your handlebars.
Insert the toggle switch part to the body:

Choose your toggle press orientation by inserting the pin in one of the grooves. This is highly dependent on your riding position and other factors. It may be necessary to re-adjust this later after field-testing. Then, fix it with the nut with a rubber sleeve:


3. Connecting it together
Now that we have the Terrain Commadn HUB powered and the handlebar controls installed, it is time to connect it together.
The HUB has 2 input cables. In case you only have one or two input devices such as a single button section and a single toggle switch, just connect them to the HUB directly.
Otherwise, it is necessary to use one or two pieces of the 8pin adapter.

To make sure the buttons are connected, press some of them and check if the LED on the HUB changes in color.
To make sure the order is correct, check the next step.
Aligning of the cables must be done individually on your bike. Make sure the cables are loose enough when turning the handlebars. Pulling the cables may significantly affect the lifespan. Make sure the cables are attached and not flapping around freely. Make sure to tighten all the screws of motorcycle parts back, especially the clutch assembly.
4. Wireless connection
Now that we have all the hardware set, it is time to connect it to the tablet/phone wirelessly.
Open the NGH app, go to Settings - Controller, and click on Pair new controller:

Available controllers will appear automatically, so you can select yours. Proceed with the instructions and allow all the necessary permissions:


After succesful pairing process, your controller will appear above:

5. Button configuration
When the connection is estabilished, it is time to configure your individual buttons in the NGH app.
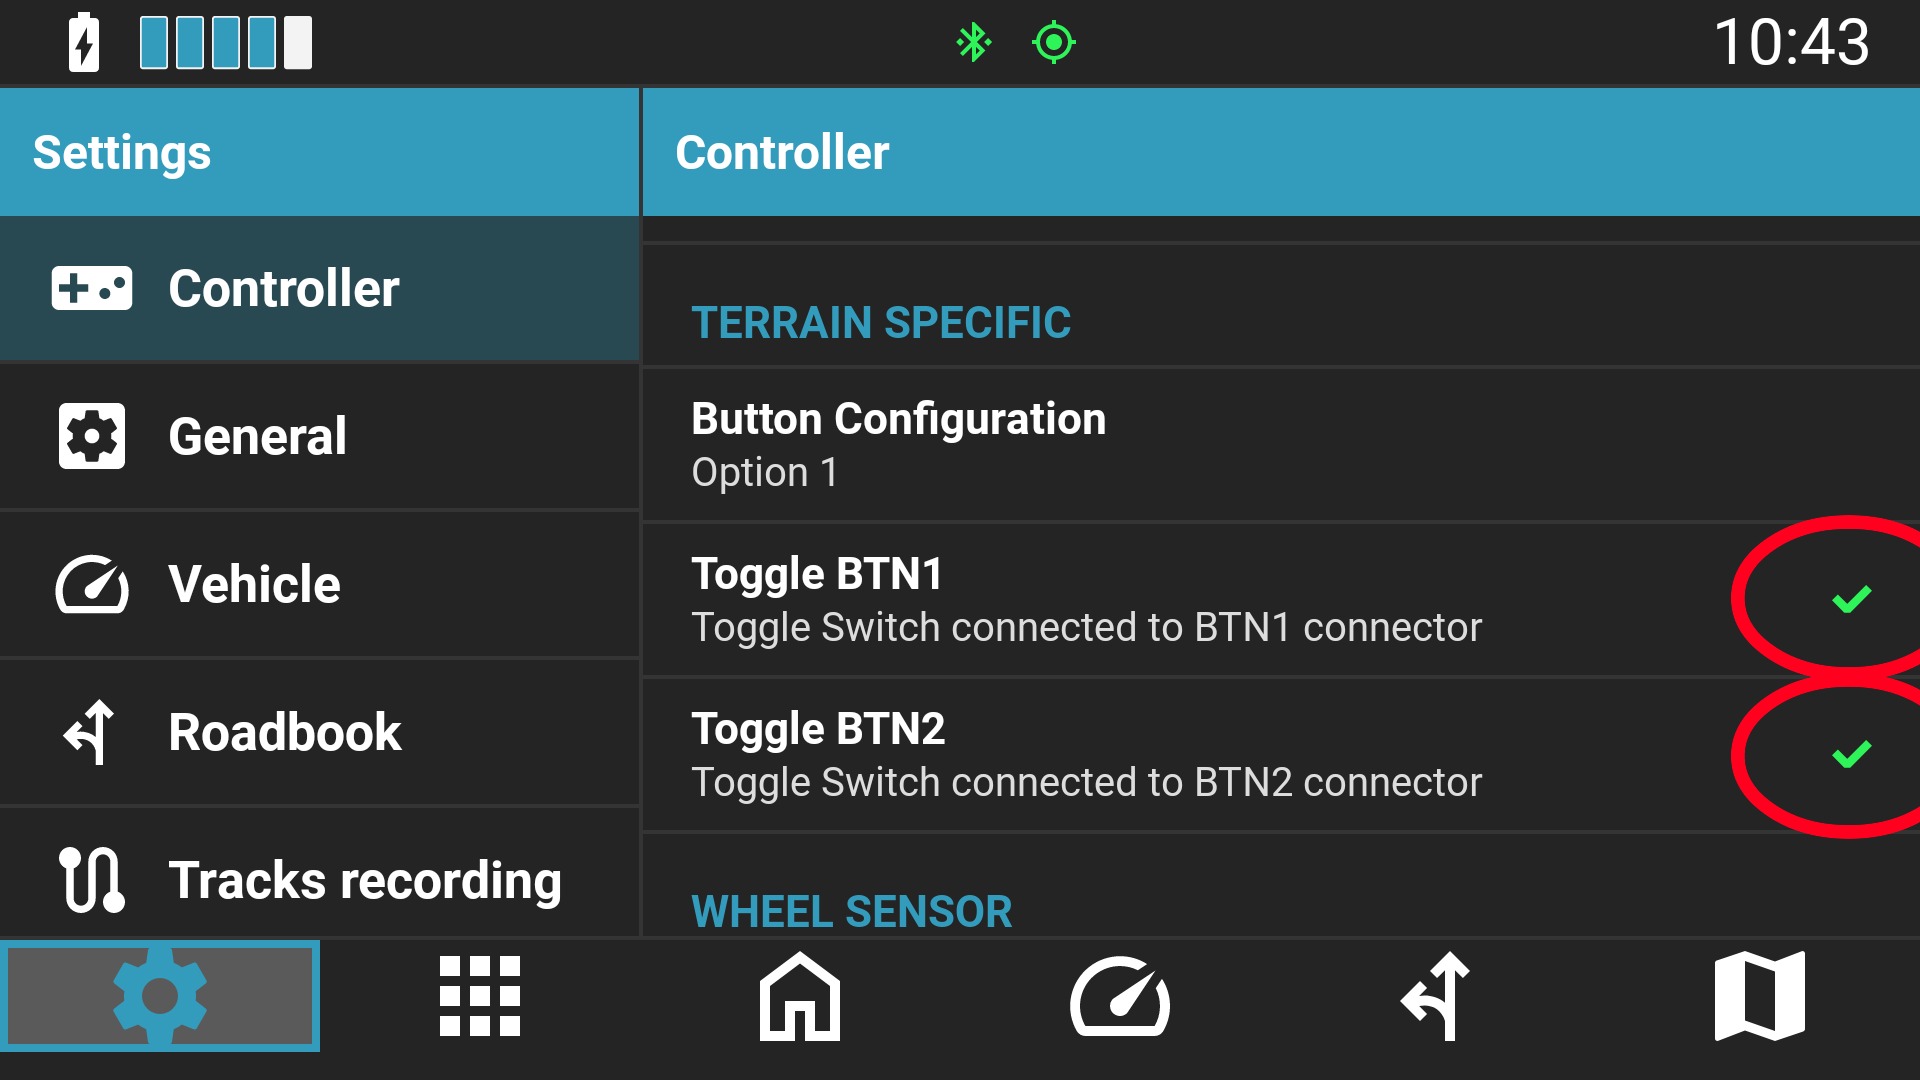
First important step is to scroll down the page and enable the toggles.
If you only use one toggle, select one.
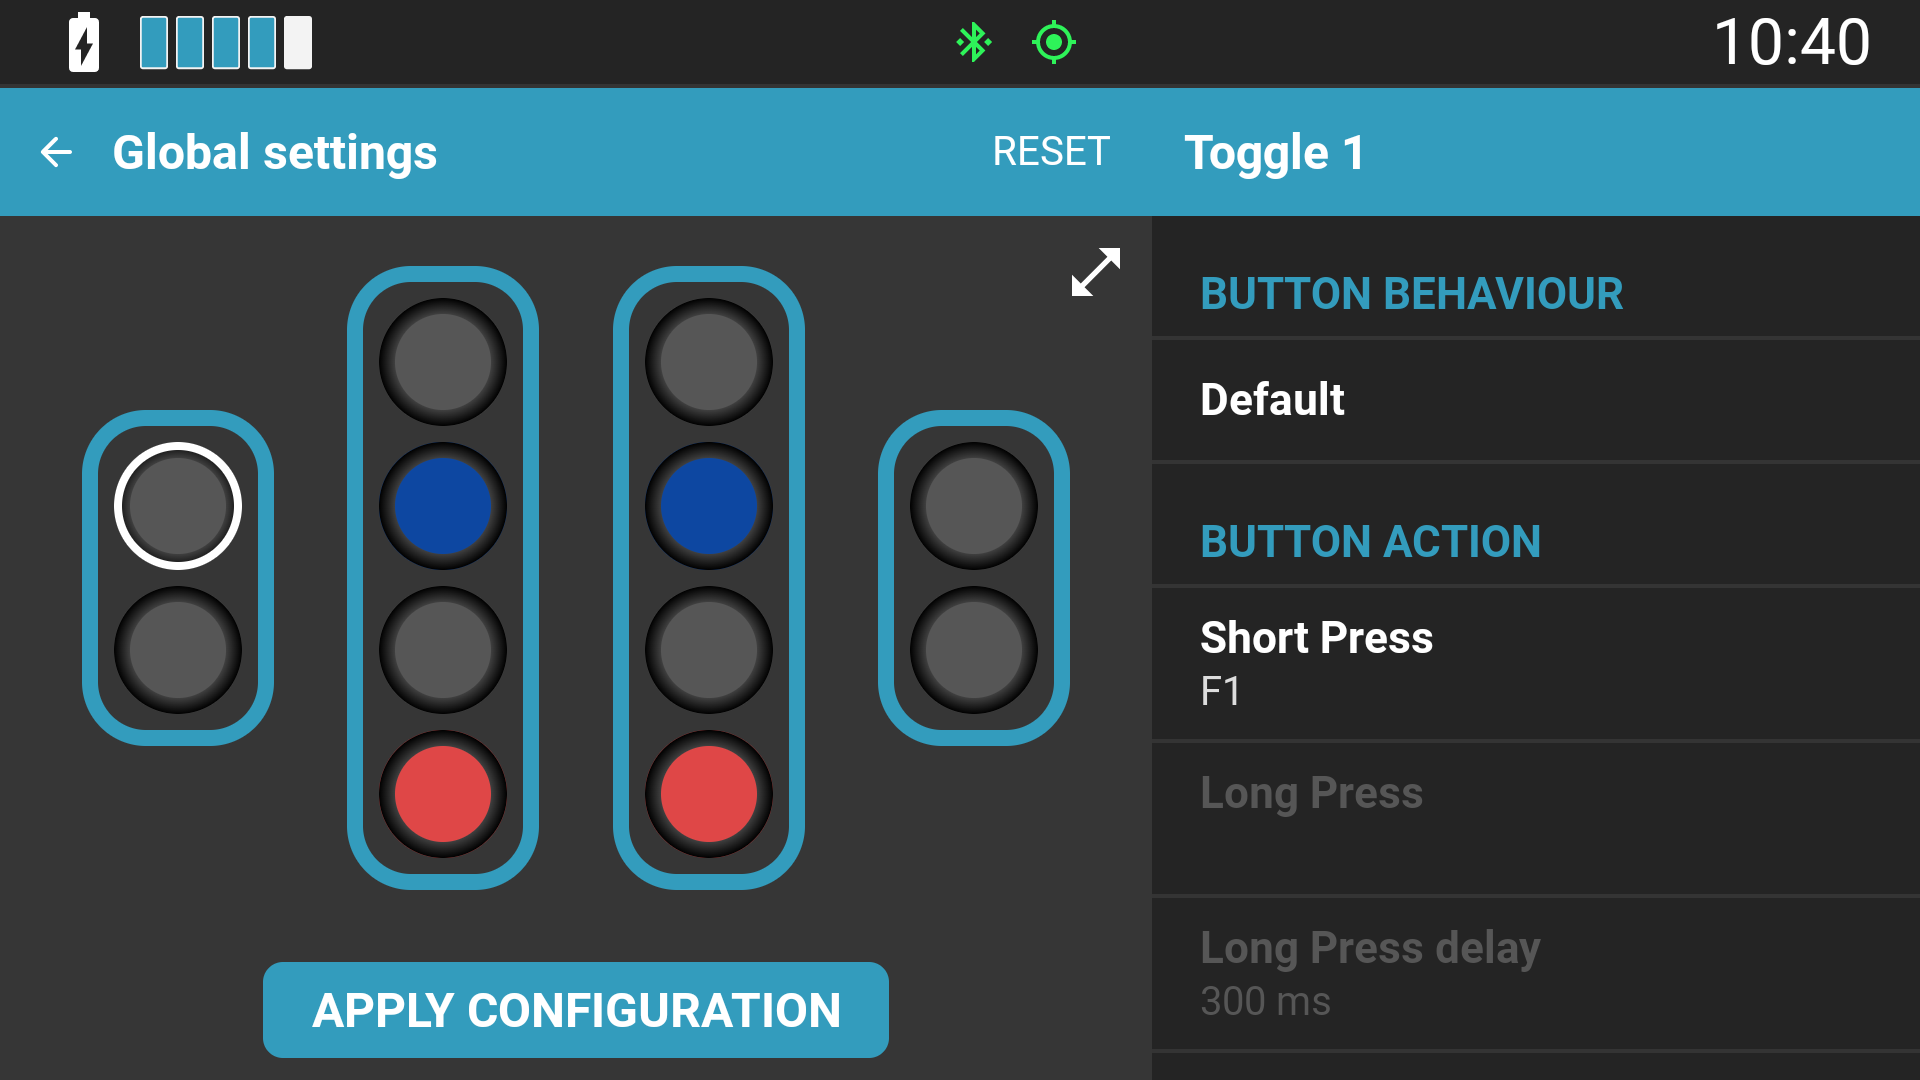
Then, open the Global settings and proceed to the button configuration:

6. Go ride and enjoy!
Was this article helpful?
That’s Great!
Thank you for your feedback
Sorry! We couldn't be helpful
Thank you for your feedback
Feedback sent
We appreciate your effort and will try to fix the article