A general guide to Tenere bikes in general: Yamaha Ténéré 700 Setup : Carpe Iter Home
A link to the product in our e-shop: https://shop.carpe-iter.eu/product/yamaha-tenere-2025-strut/?preview=true
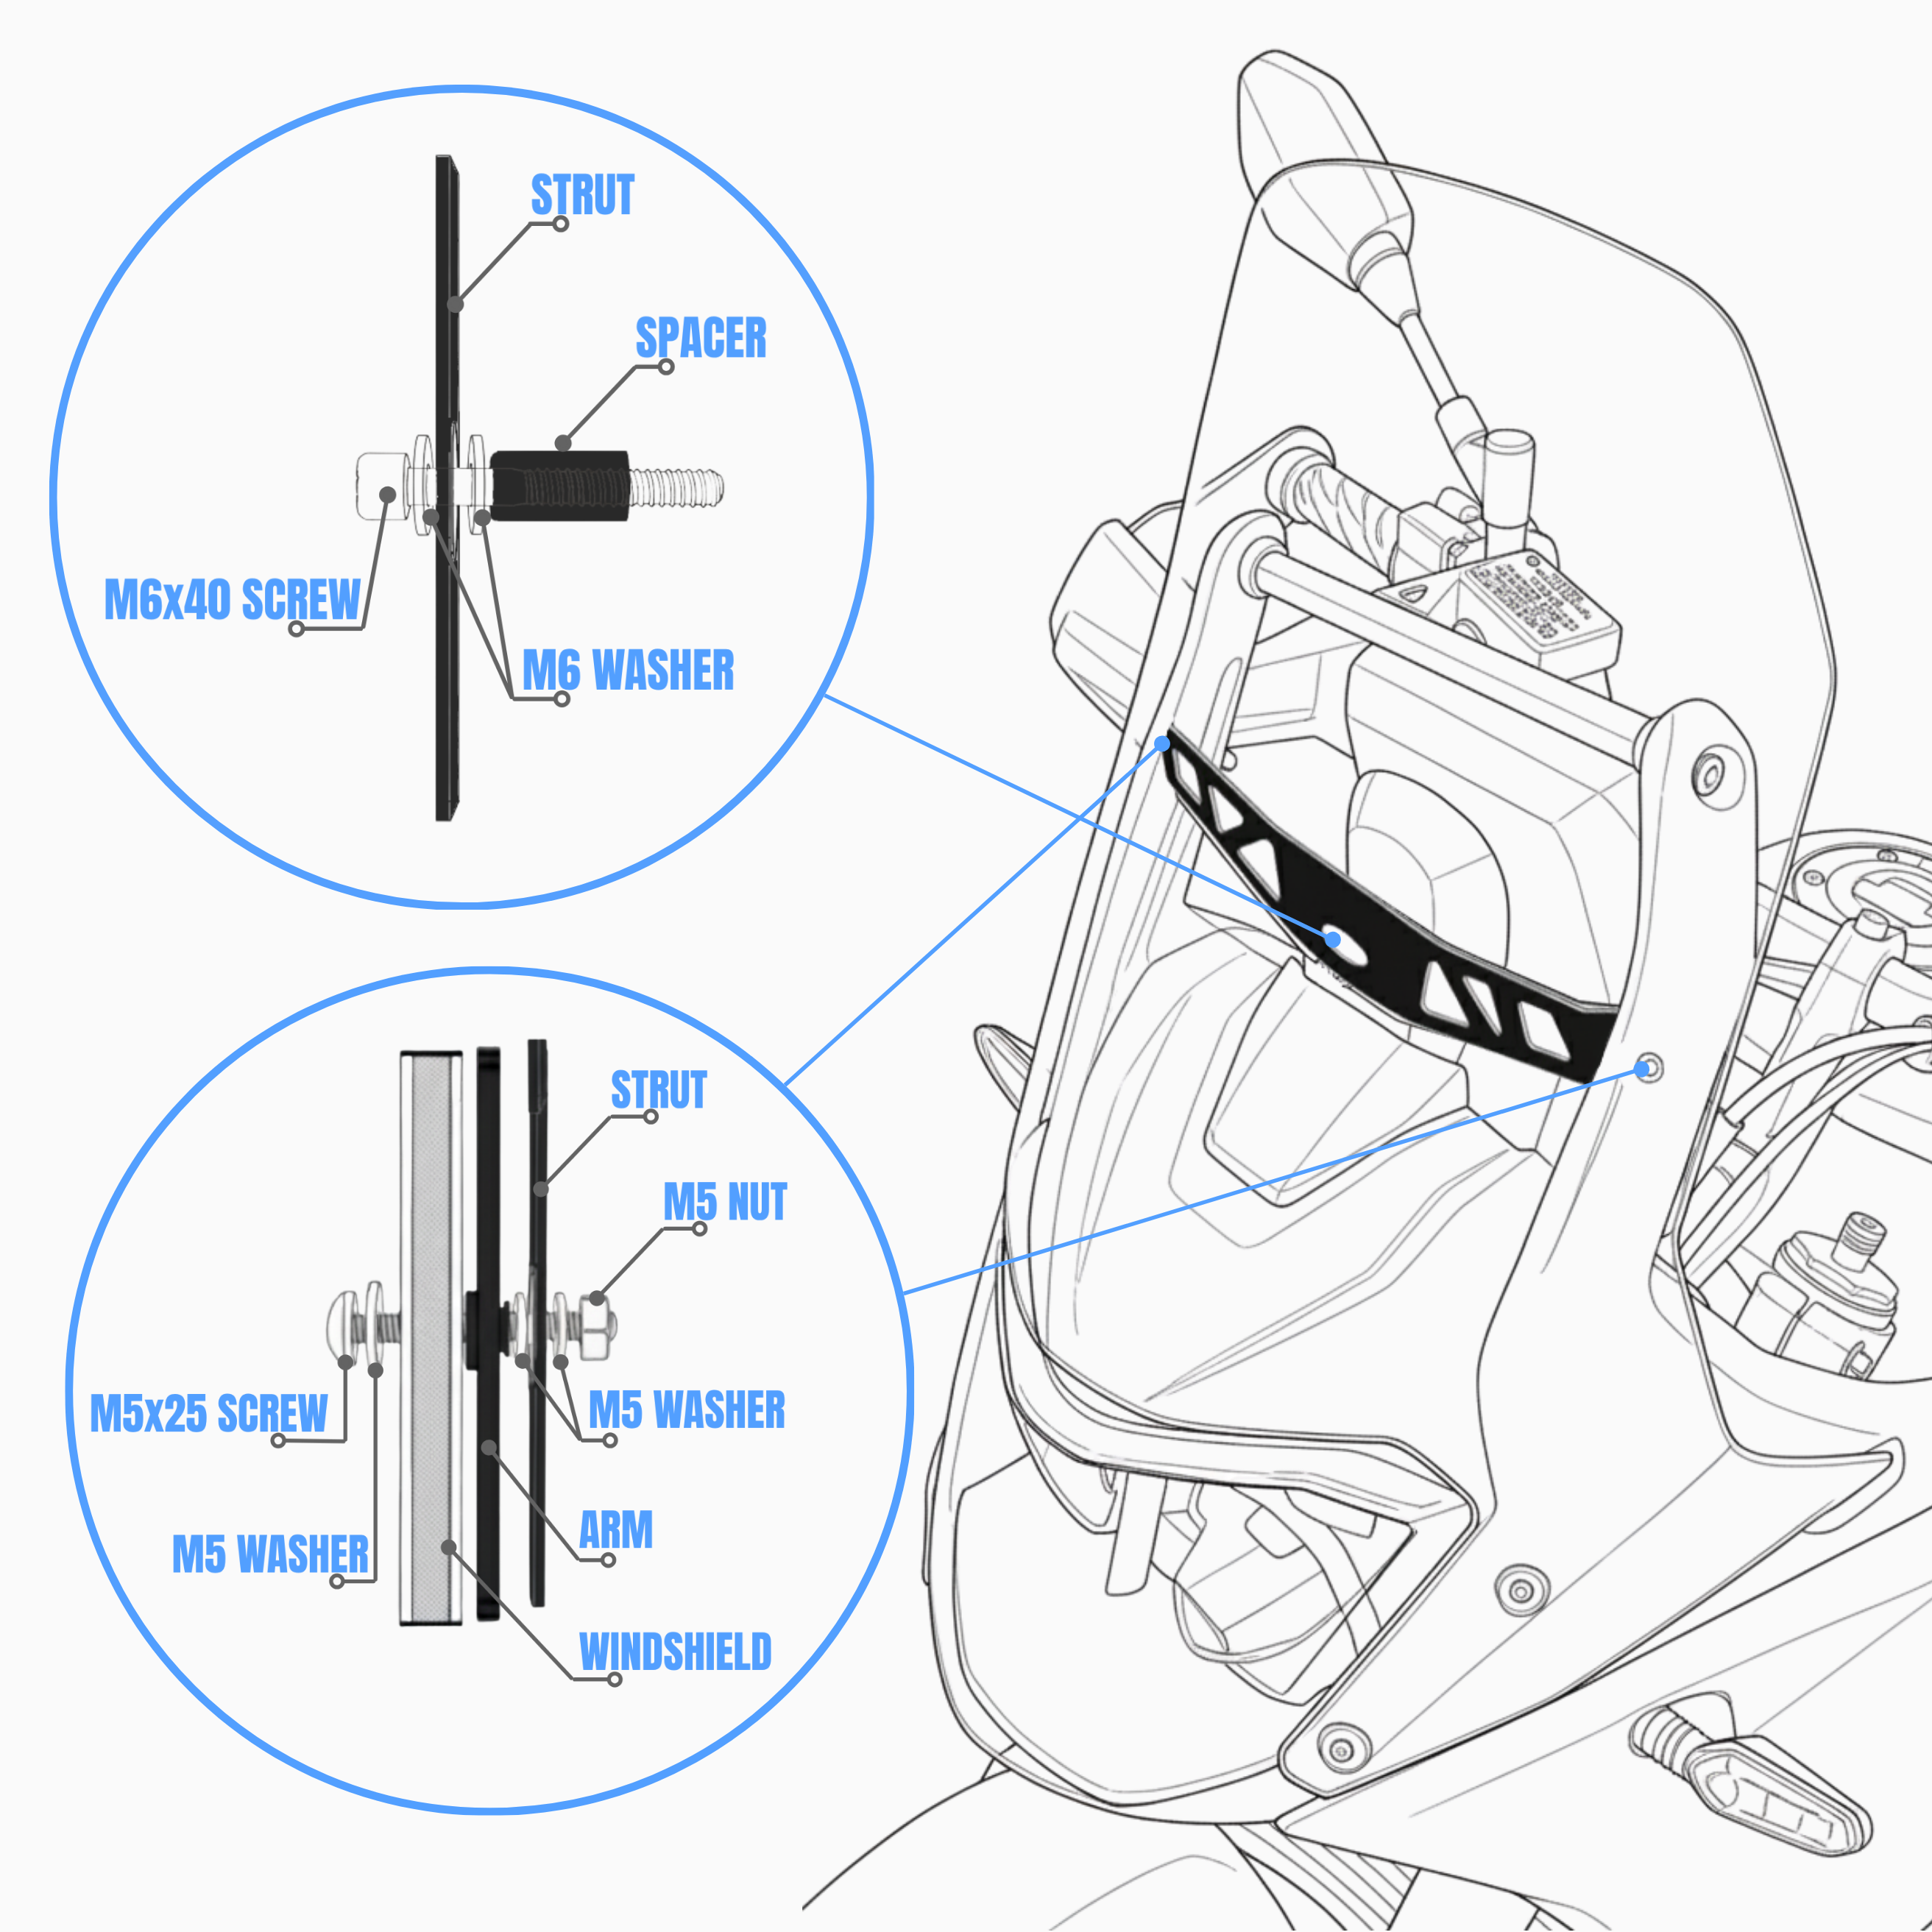
The 2025 Tenere doesn't fit the previous generation bracket, but also, the front plastics were slightly reinforced by the factory. In result, it seems now to be durable enough to handle a smartphone. If a larger device is used, this stabilizing strut is what delivers the extra support.
Installation:
- Remove the 6 screws holding the windshield.
- Remove the original M6 screw securing the LCD from the front of the bike.
- Prepare the central M6x40 screw with the strut, washers and spacer and insert it to the central hole securing the LCD from the front of the bike.
- Align the side holes to match the rubber nuts placed in the GPS-bracket arms of the bike. You can put M5 screws to the rubber nuts mounted from the LCD side to secure the strut in this position.
- Tighten the central M6x40 screw fully. Keep in mind the strut only avoids vibrations and flex of the plastic assembly. It is not necessary to tighten it extensively. The nylon washers and grooves are supposed to allow movement of the strut in case of crash to avoid unnecessary fairings cracking. Keep this in mind when tightening.
- Put the windshield back in place and secure it with the bottom 4 screws in the headlight area. Tighten the screws fully.
- On one side, put the M5 screw with a washer to one of the top holes from the windshield side and tighten it progressively. At certain point, insert washer in between the rubber nut and the strut. Proceed with tightening of the screw to fix the windscreen in place.
- Put an additional washer on the M5 screw's end and secure it with the M5 nut.
- Repeat on the other side.
The installation is complete!
Dislaimer:
- Doesn't fit the 2026 World Raid version, which has a taller windshield
- It is targeted to be used for adventure riding. In case your primary intention is to race and ride very hard offroad with the Tenere 700, a proper rally tower is still recommended.
Was this article helpful?
That’s Great!
Thank you for your feedback
Sorry! We couldn't be helpful
Thank you for your feedback
Feedback sent
We appreciate your effort and will try to fix the article