

All Carpe Iter handlebar controllers can be fully customized via the on-screen interface in NGH. Customization is entirely optional, as every Carpe Iter Bluetooth controller comes pre-loaded with a functional default profile.
You can apply configurations globally across all apps or configure the controller individually for each supported GPS application.
Note: Global settings apply across standard GPS navigation apps, but do not affect specialized rally/roadbook applications such as TerraPirata or Rally Navigator, which employ app-specific command sets.
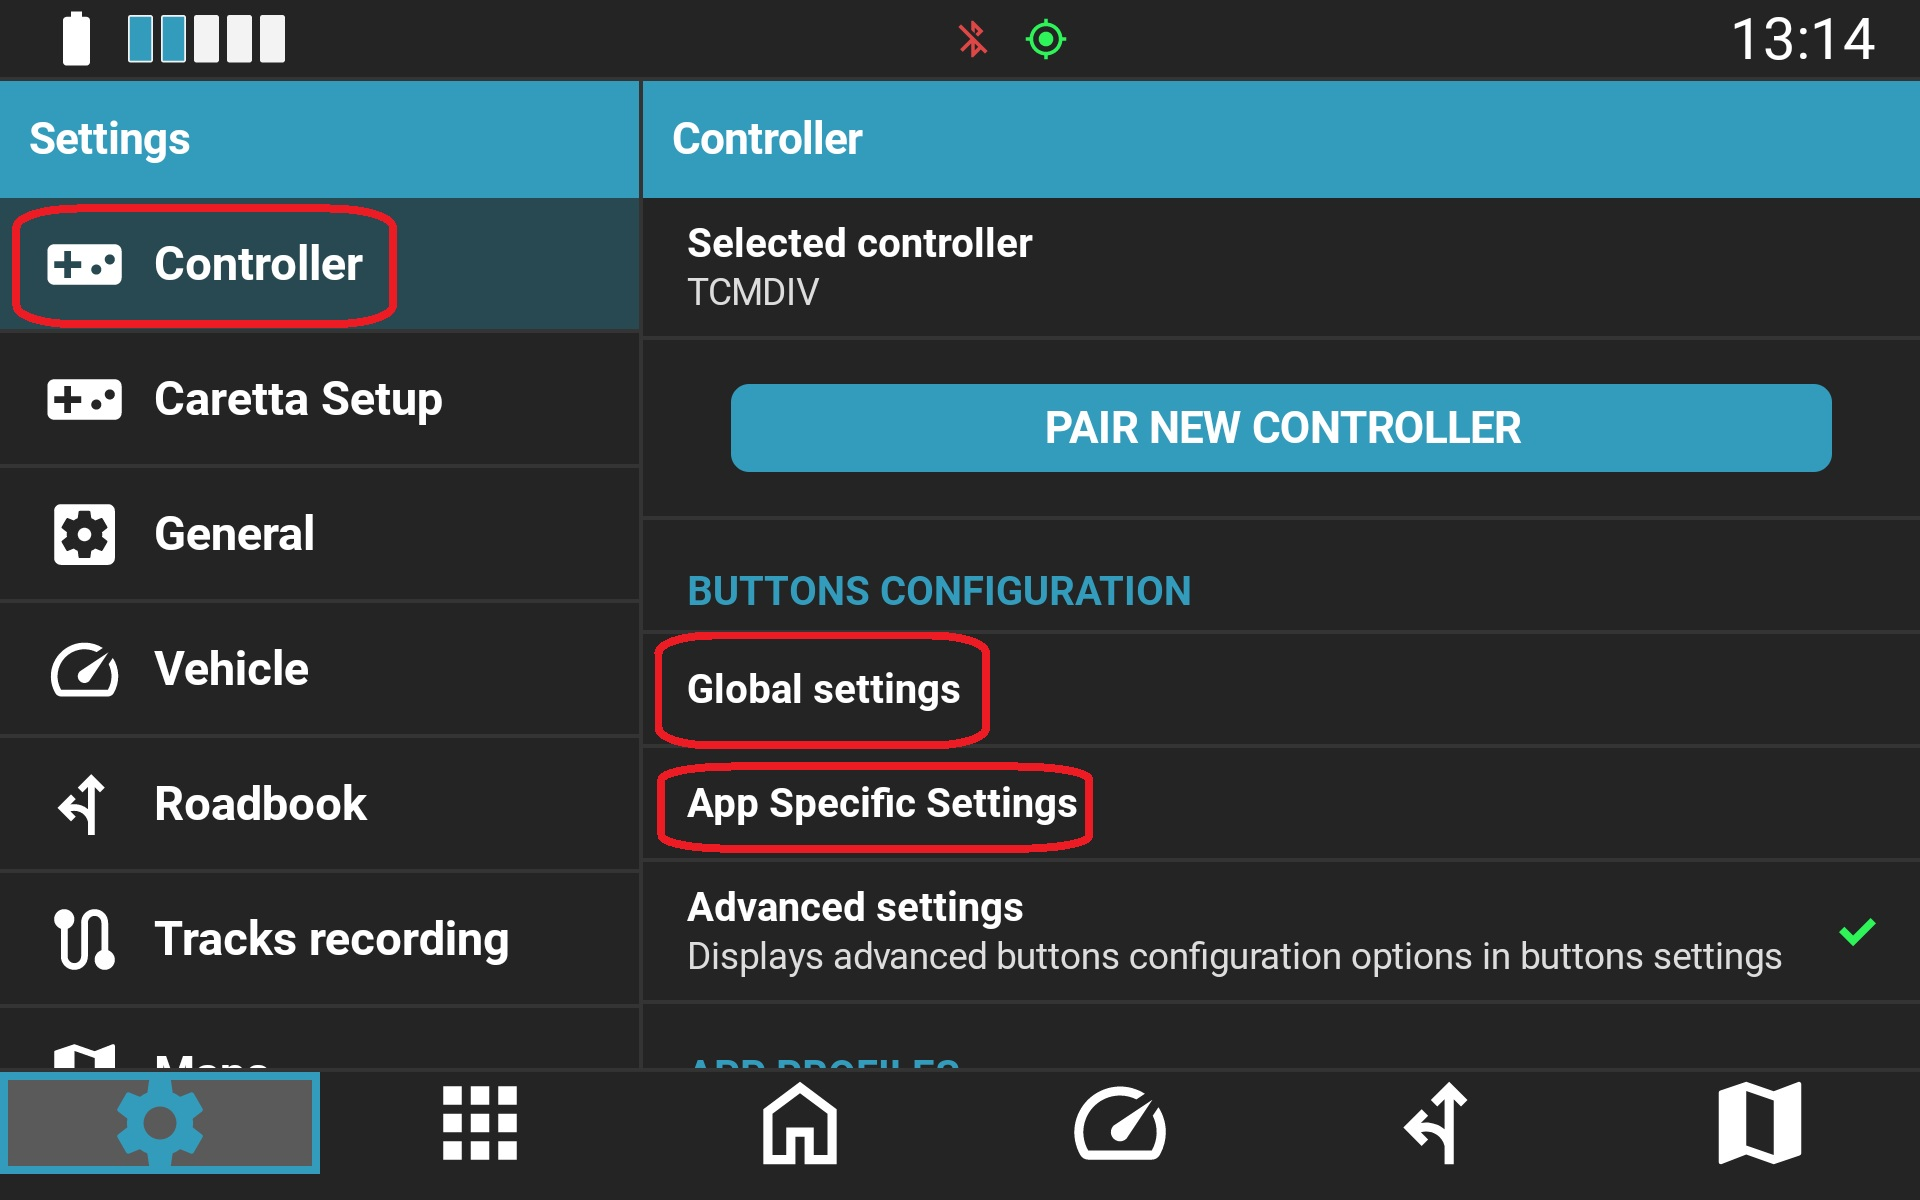
Why Customize?
Customization allows you to adapt controller behavior to your workflow across different applications. For example, in Google Maps where manual map panning may not be needed, you can remap those inputs to control media playback or an action camera.
You can also invert controls (such as swapping Zoom In and Zoom Out) or leverage advanced navigation features. Applications like Locus Map and MyRoute-app offer extensive functionality beyond default profiles, which can be assigned to any available physical input.
The configuration options shown below apply both to the Global profile and to each individual application profile.
1. Function Configuration
In addition to predefined navigation commands (zooming, map panning, re-centering, track recording, map styles, and overlays), Carpe Iter controllers can be programmed with any standard 102-key hardware keyboard keycode, including modifiers (Shift, Ctrl, Alt) and numeric keypad keys.
Dedicated control categories include:
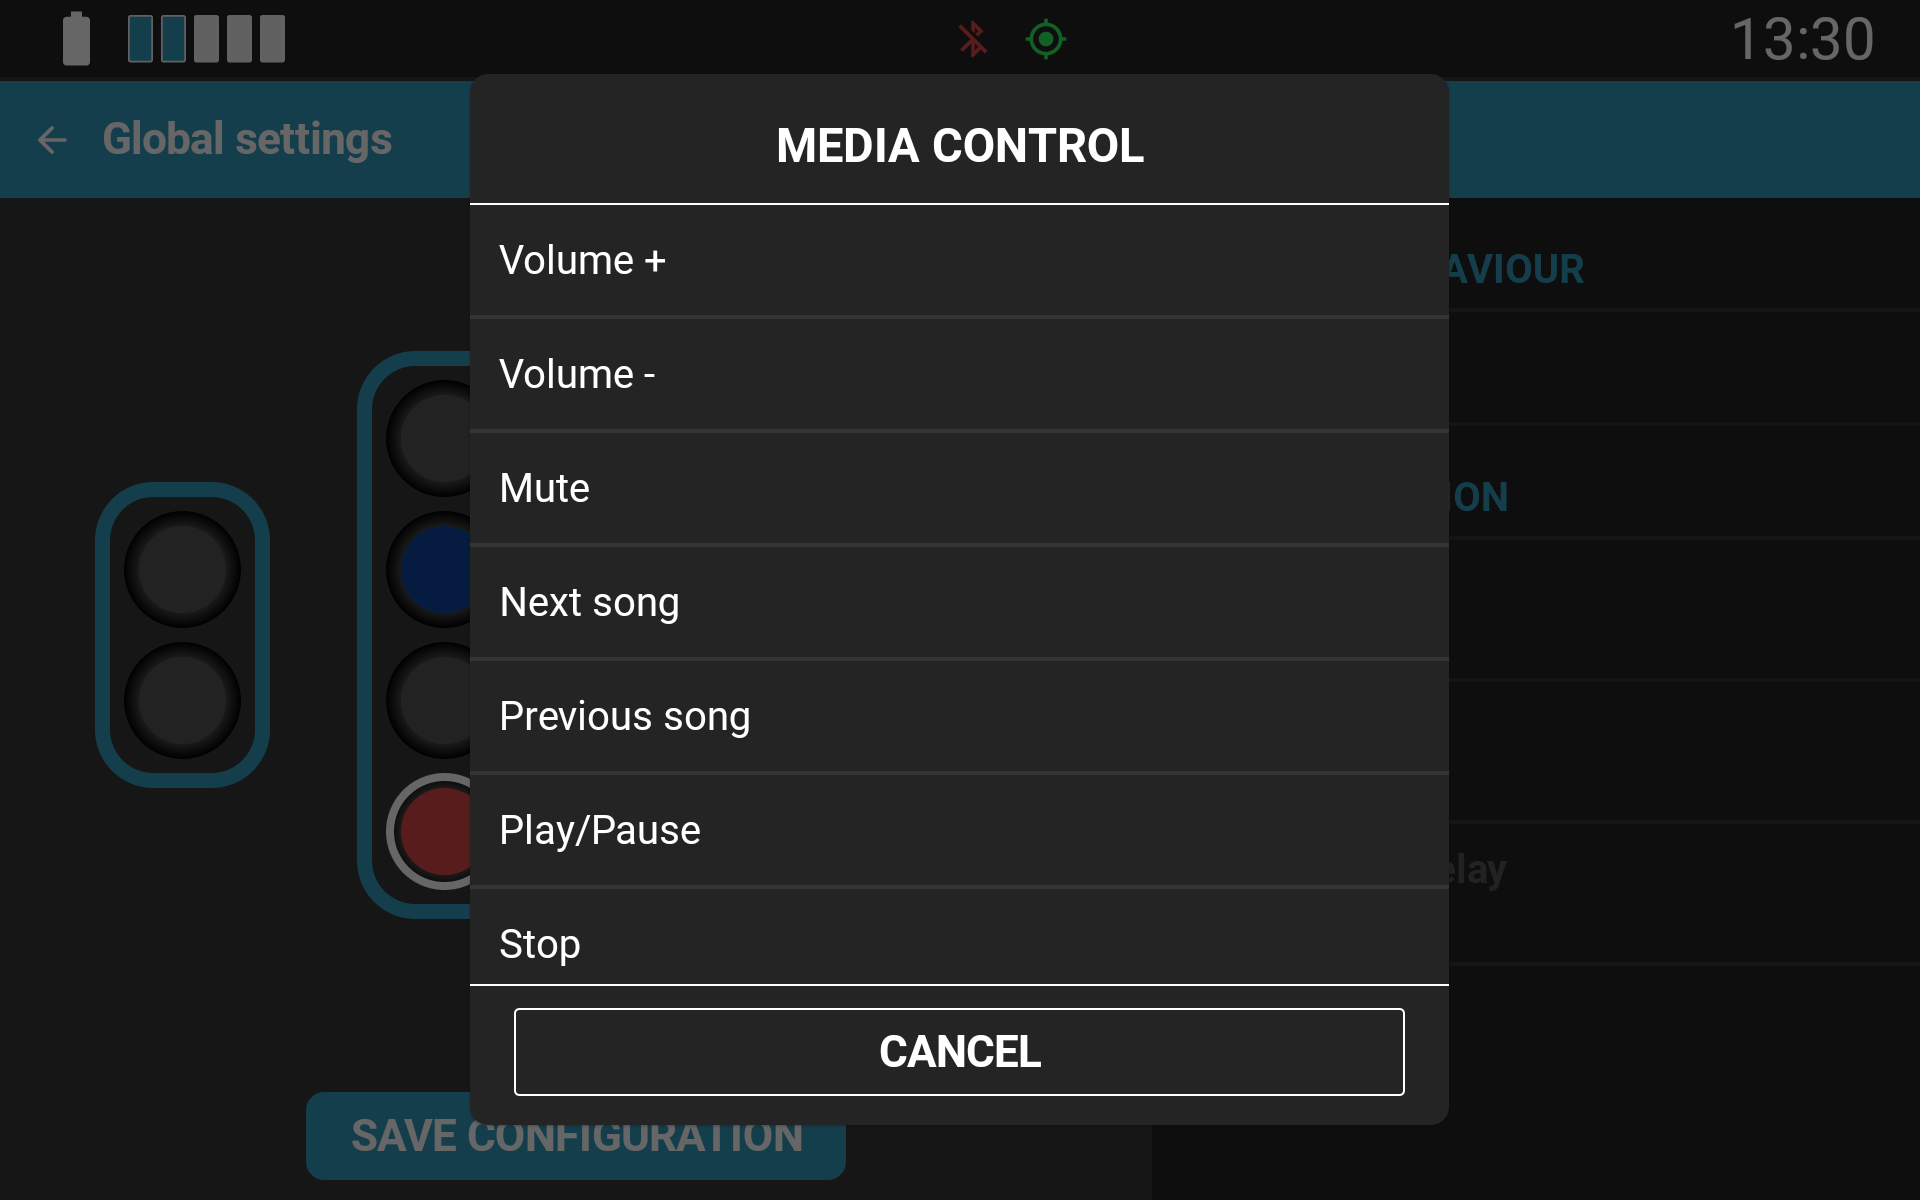
- Media: Play, Pause, Next, Previous, Mute, Volume Up/Down.
- Action Cameras: Start/Stop Recording, Take Photo, Live Preview (Insta360 cameras currently supported; DJI support in development).
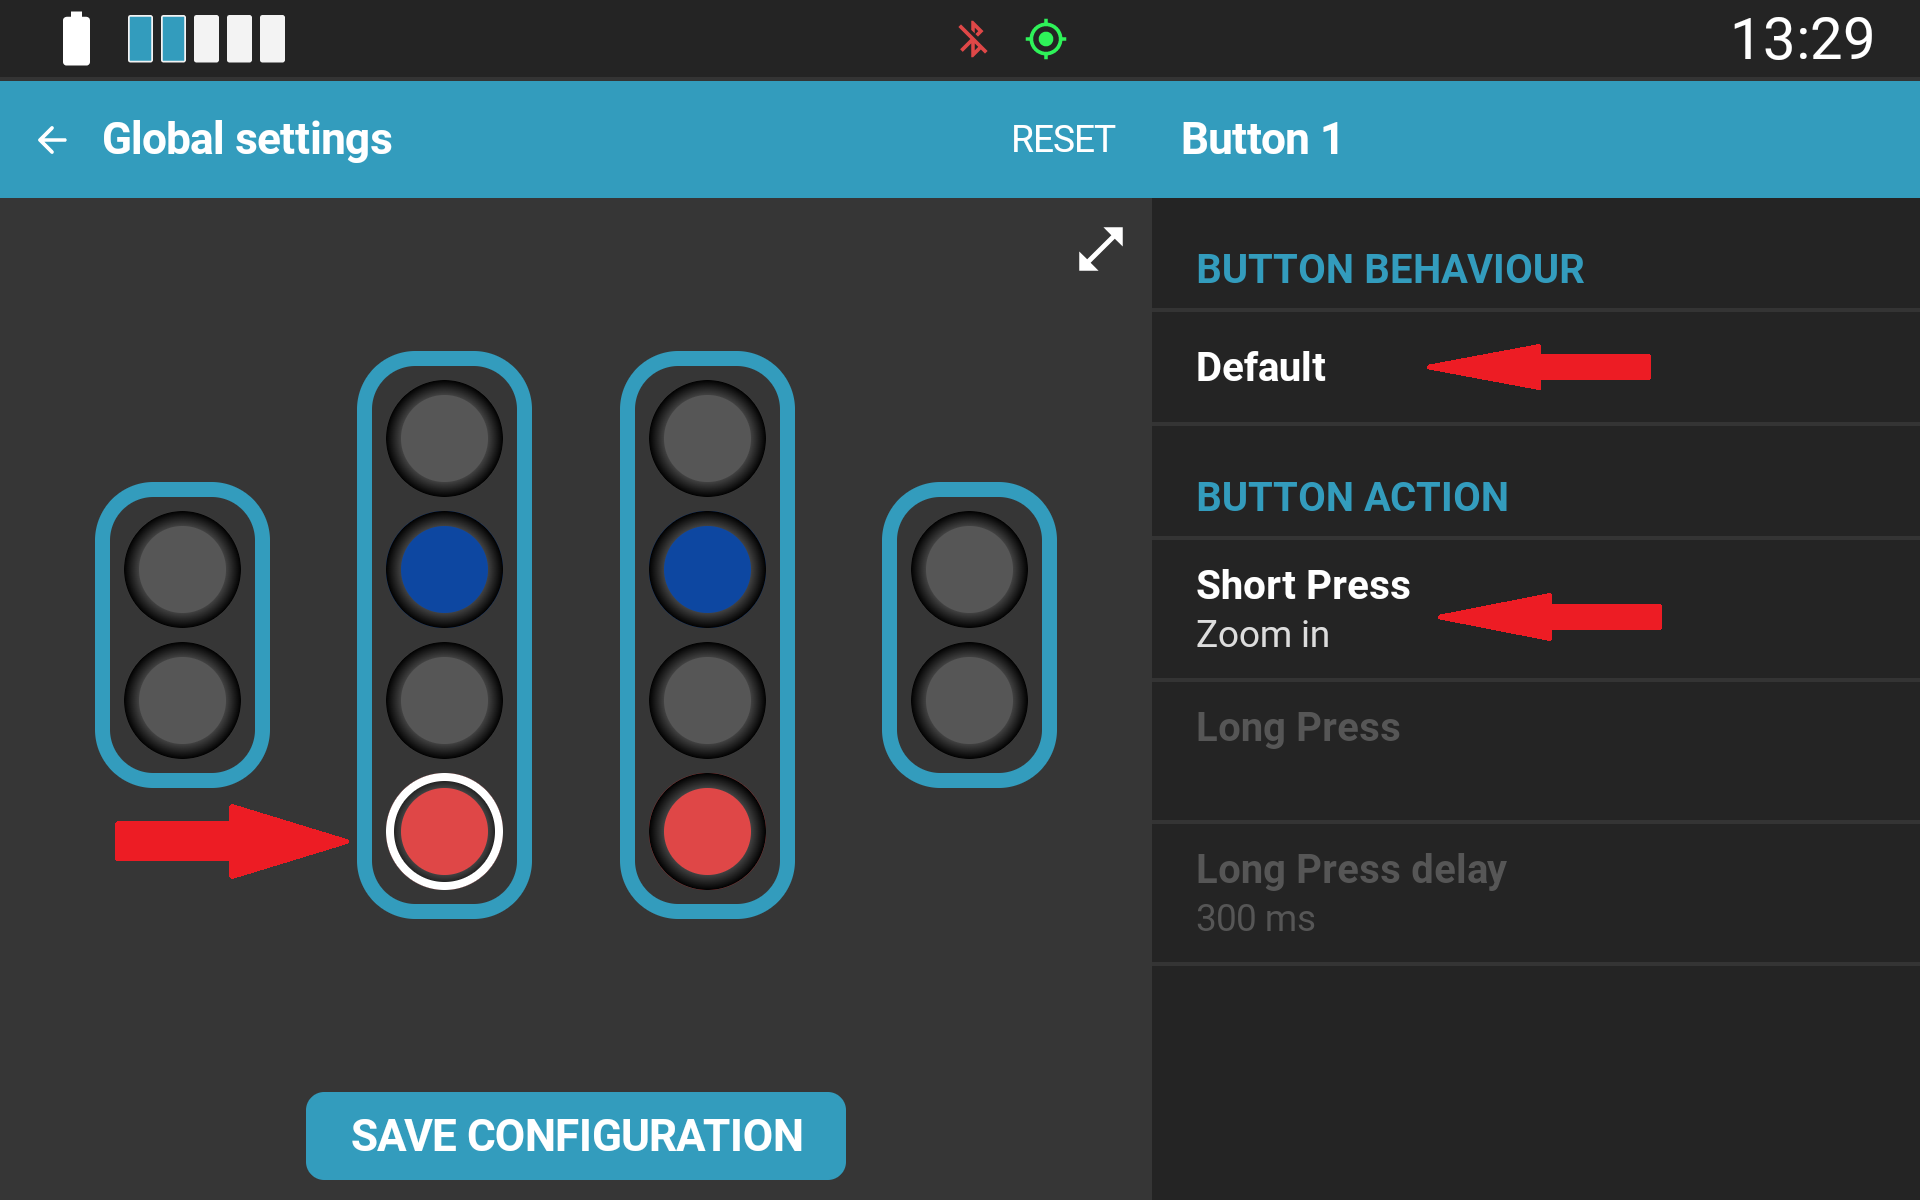
Configuration interface example for the Terrain Command III with Toggle Switches:
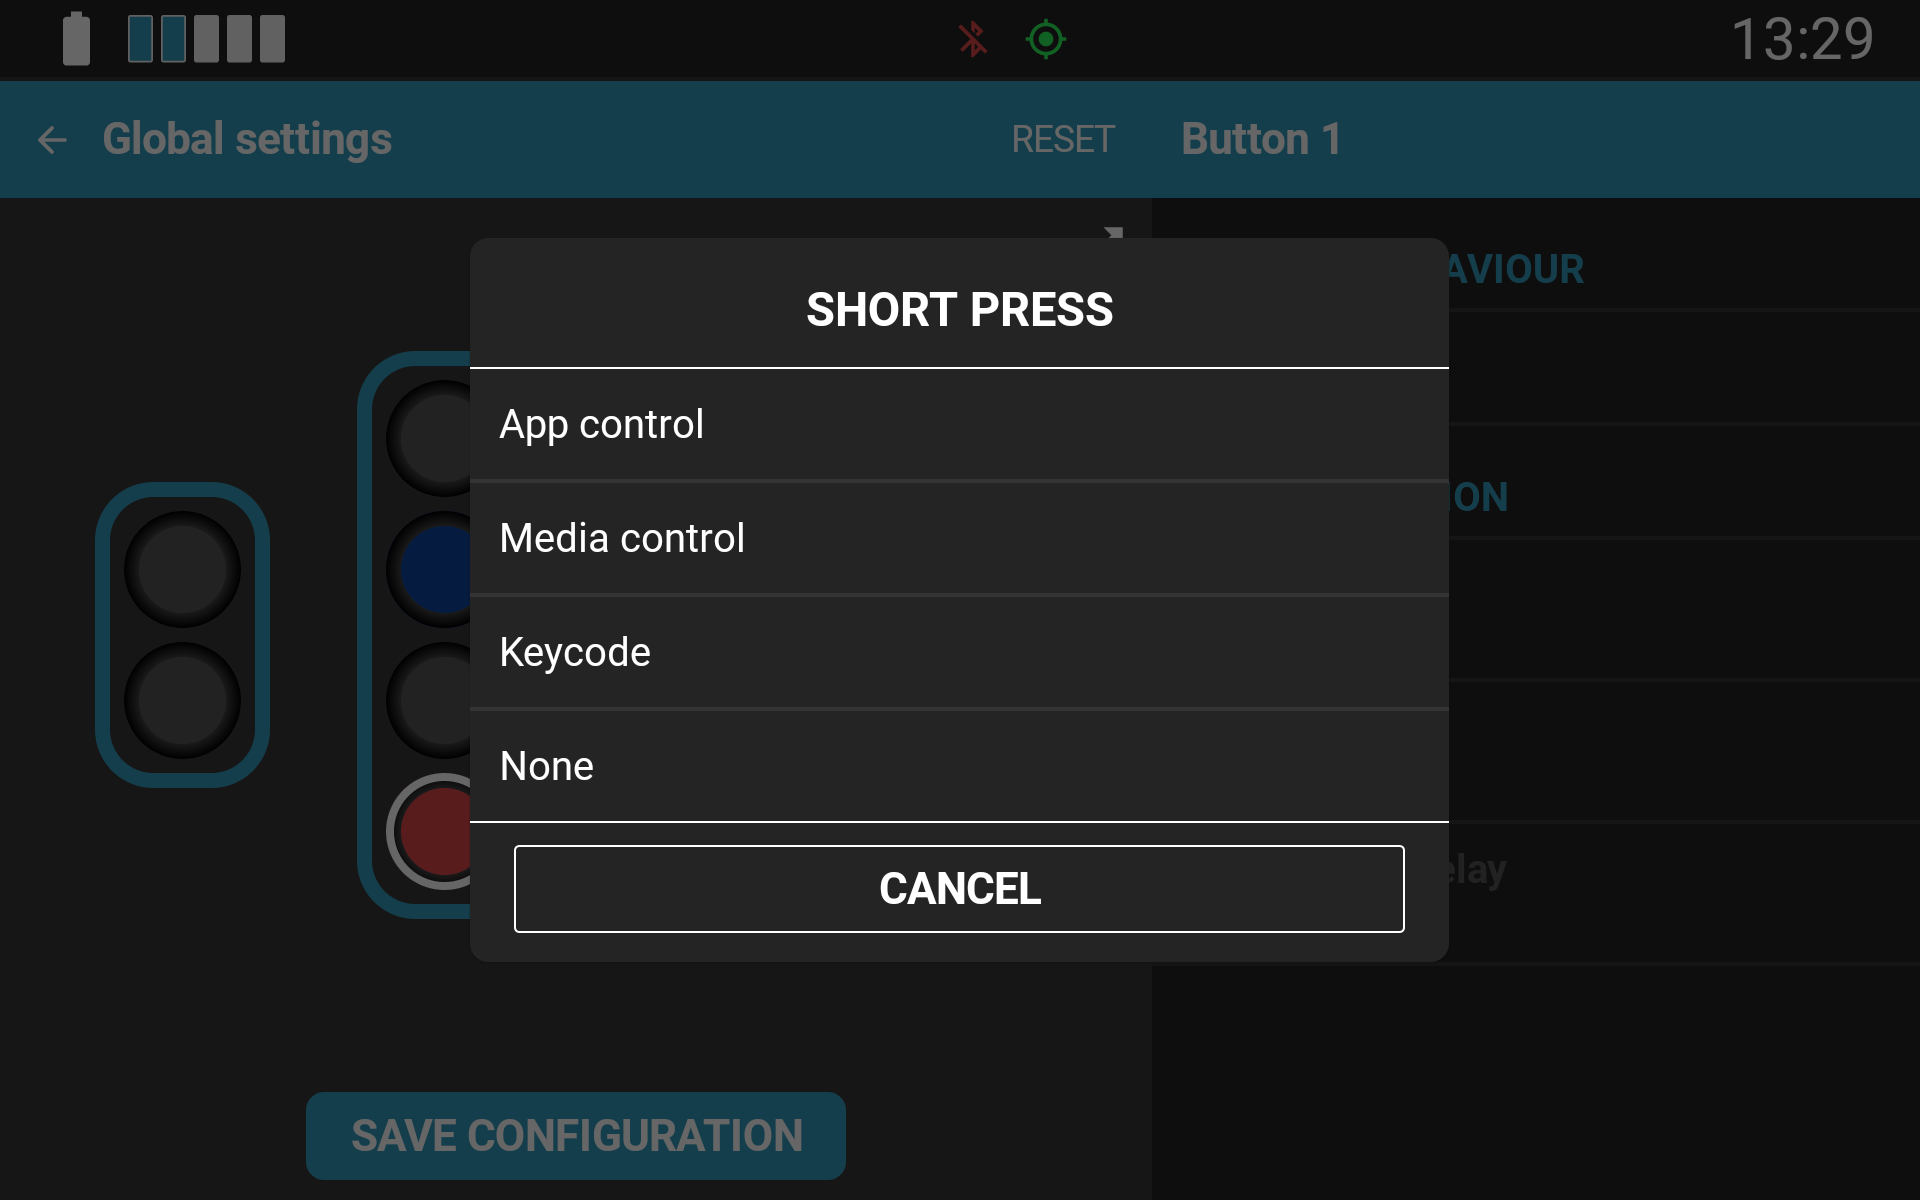
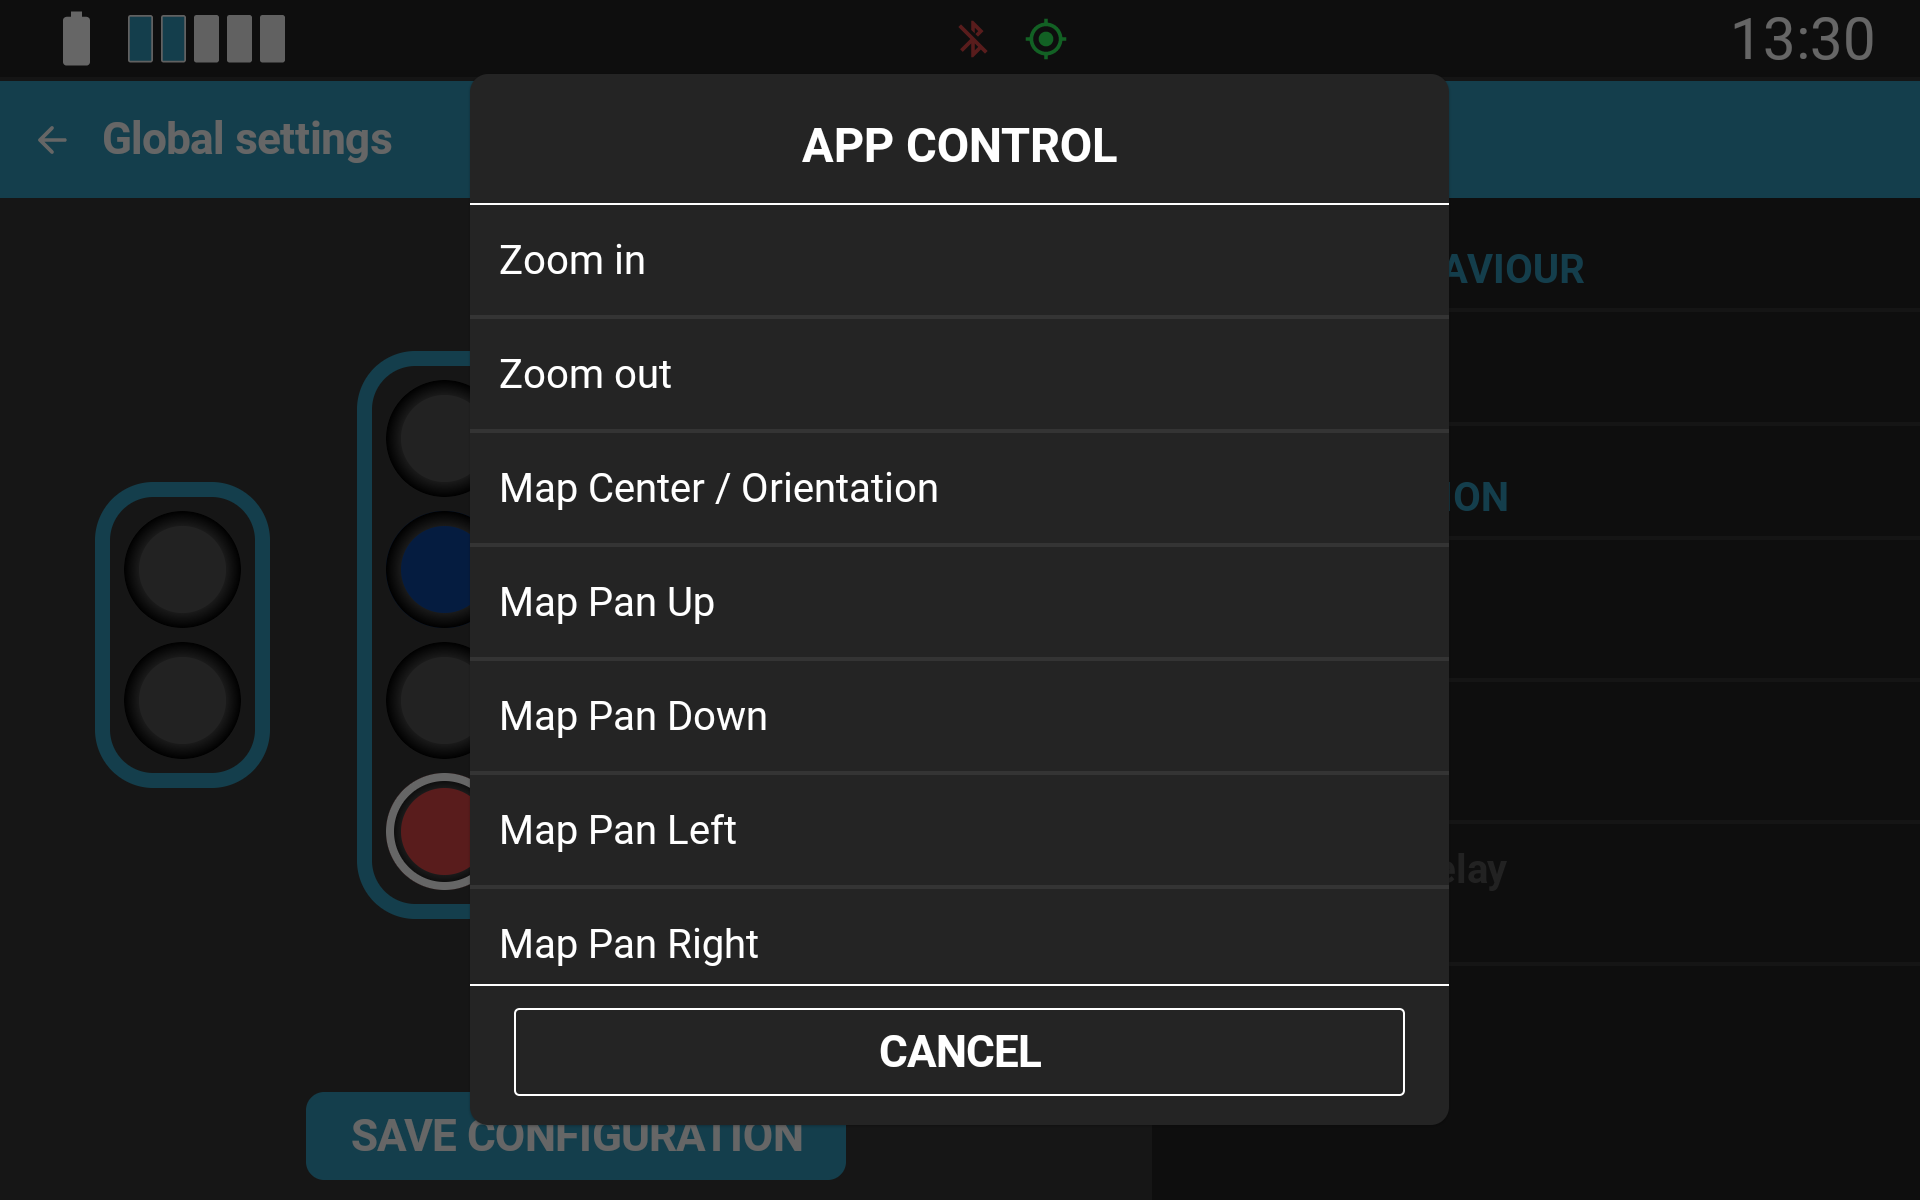
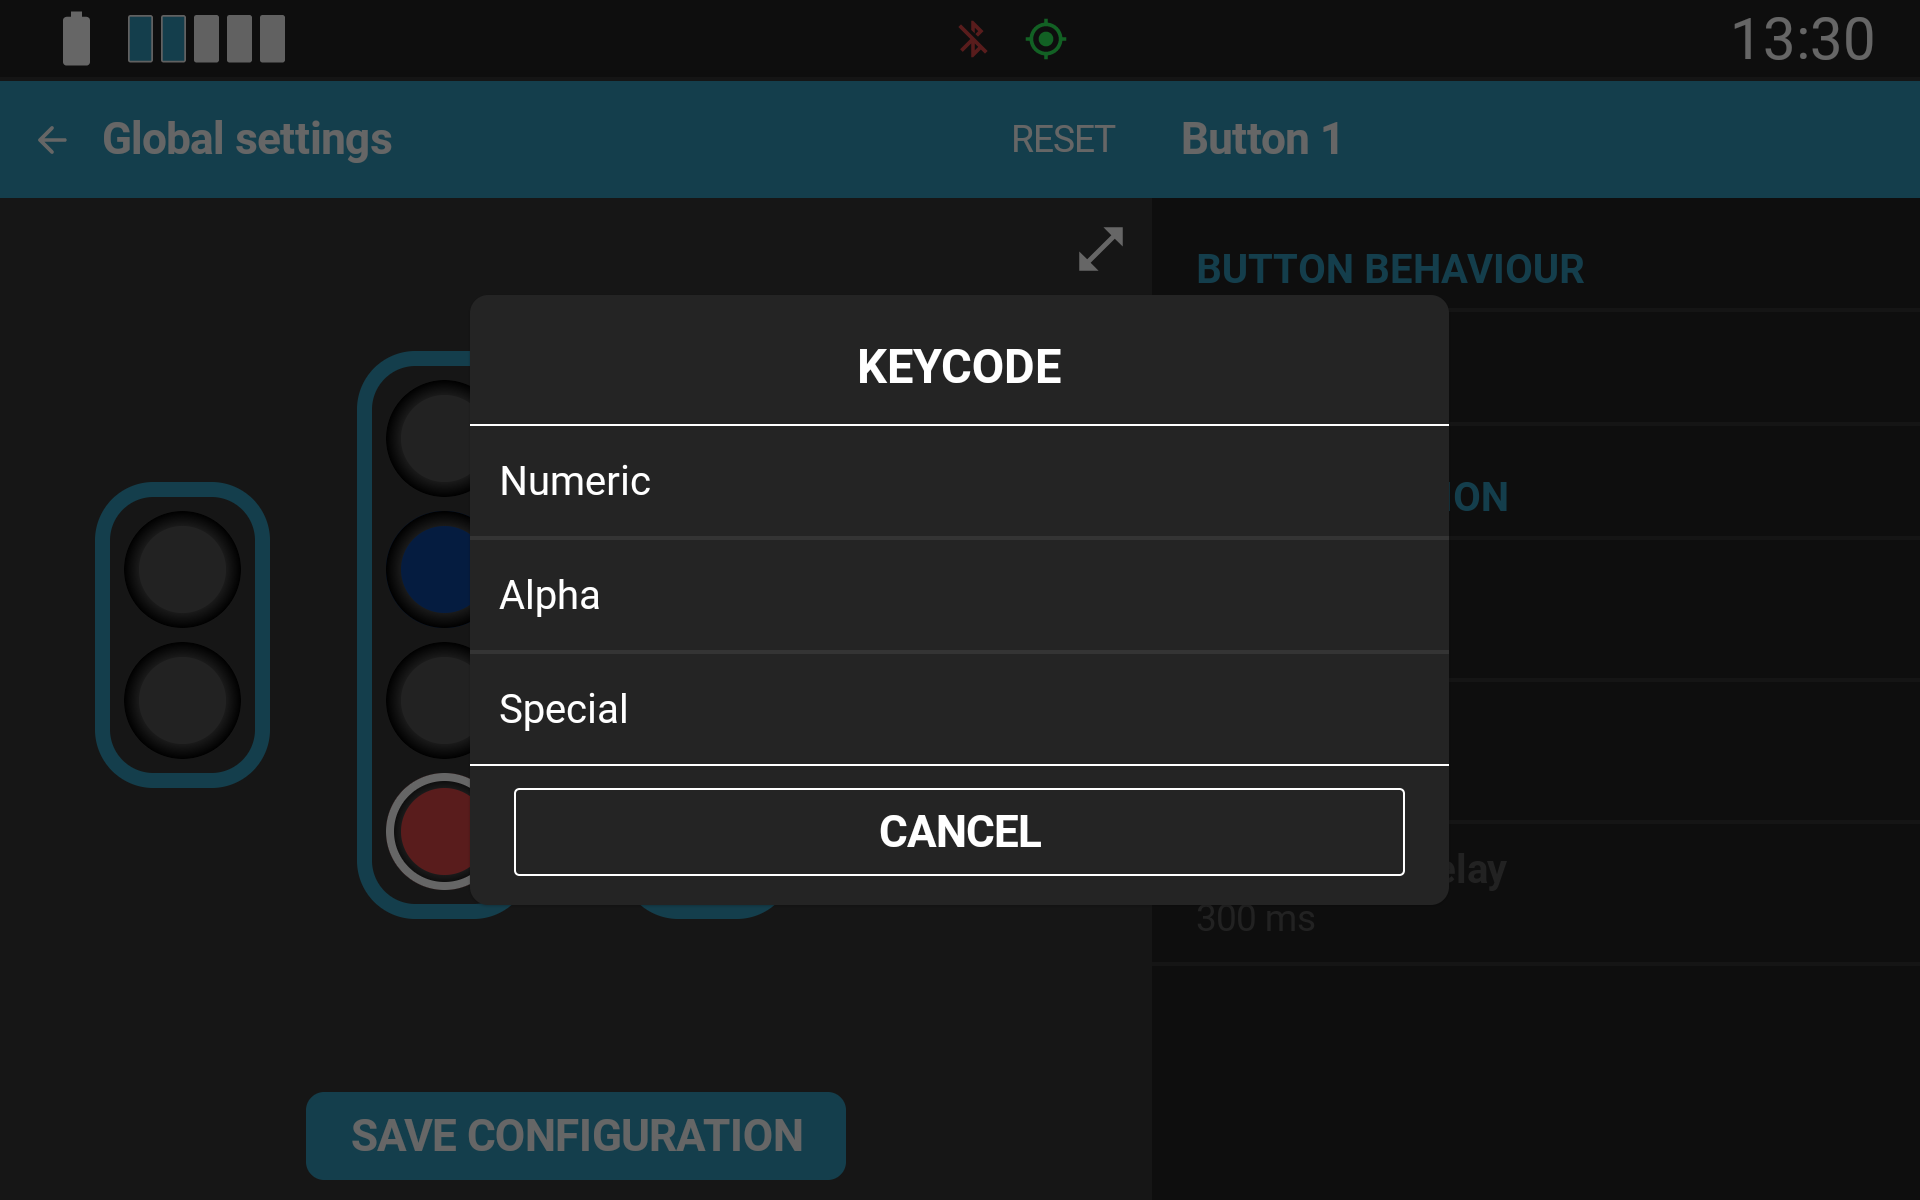
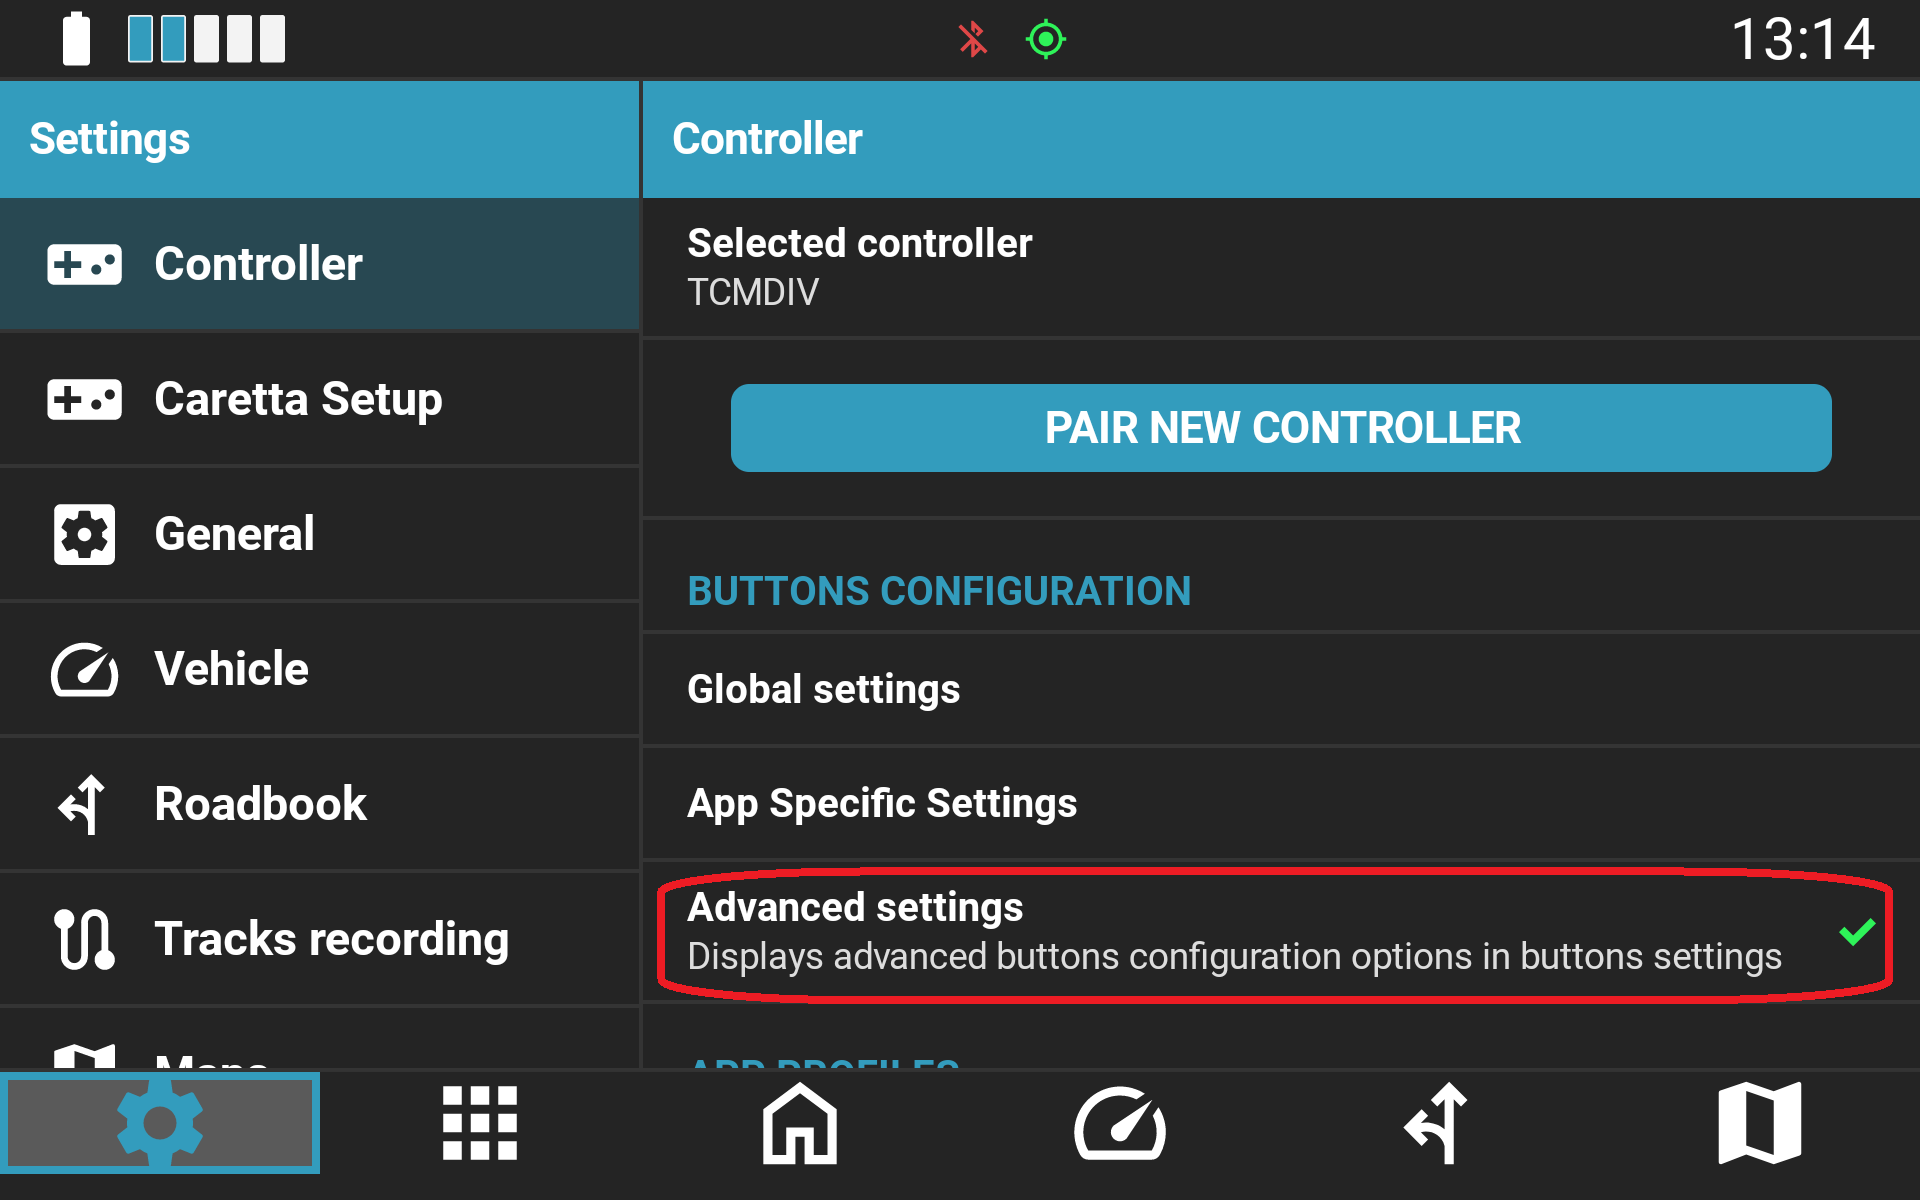
Extended keycode options are hidden by default to keep the interface streamlined. They can be enabled by toggling Advanced settings in the controller configuration menu.
These keycodes allow you to map Carpe Iter controllers to third-party applications that accept keyboard input, enabling custom profiles for apps without native integration.
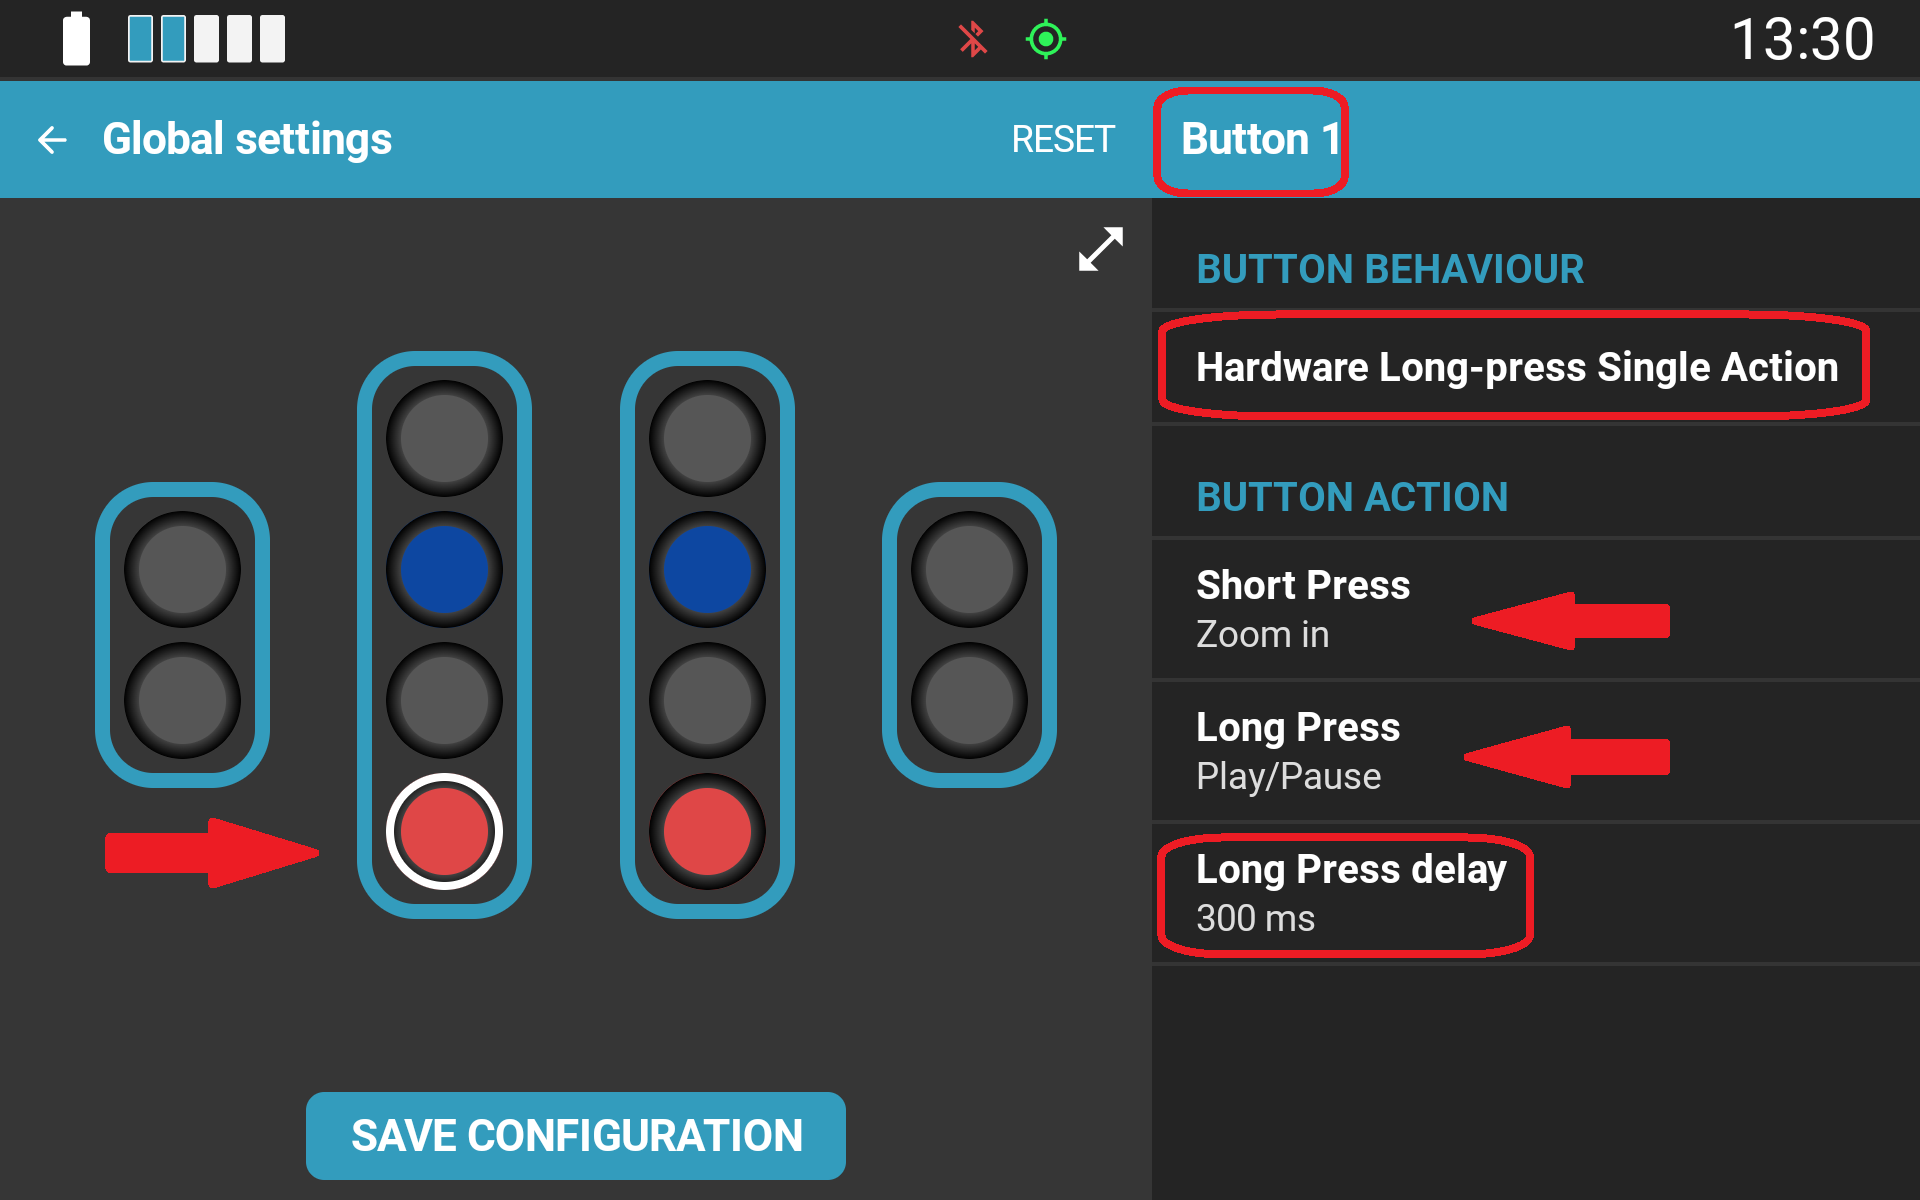
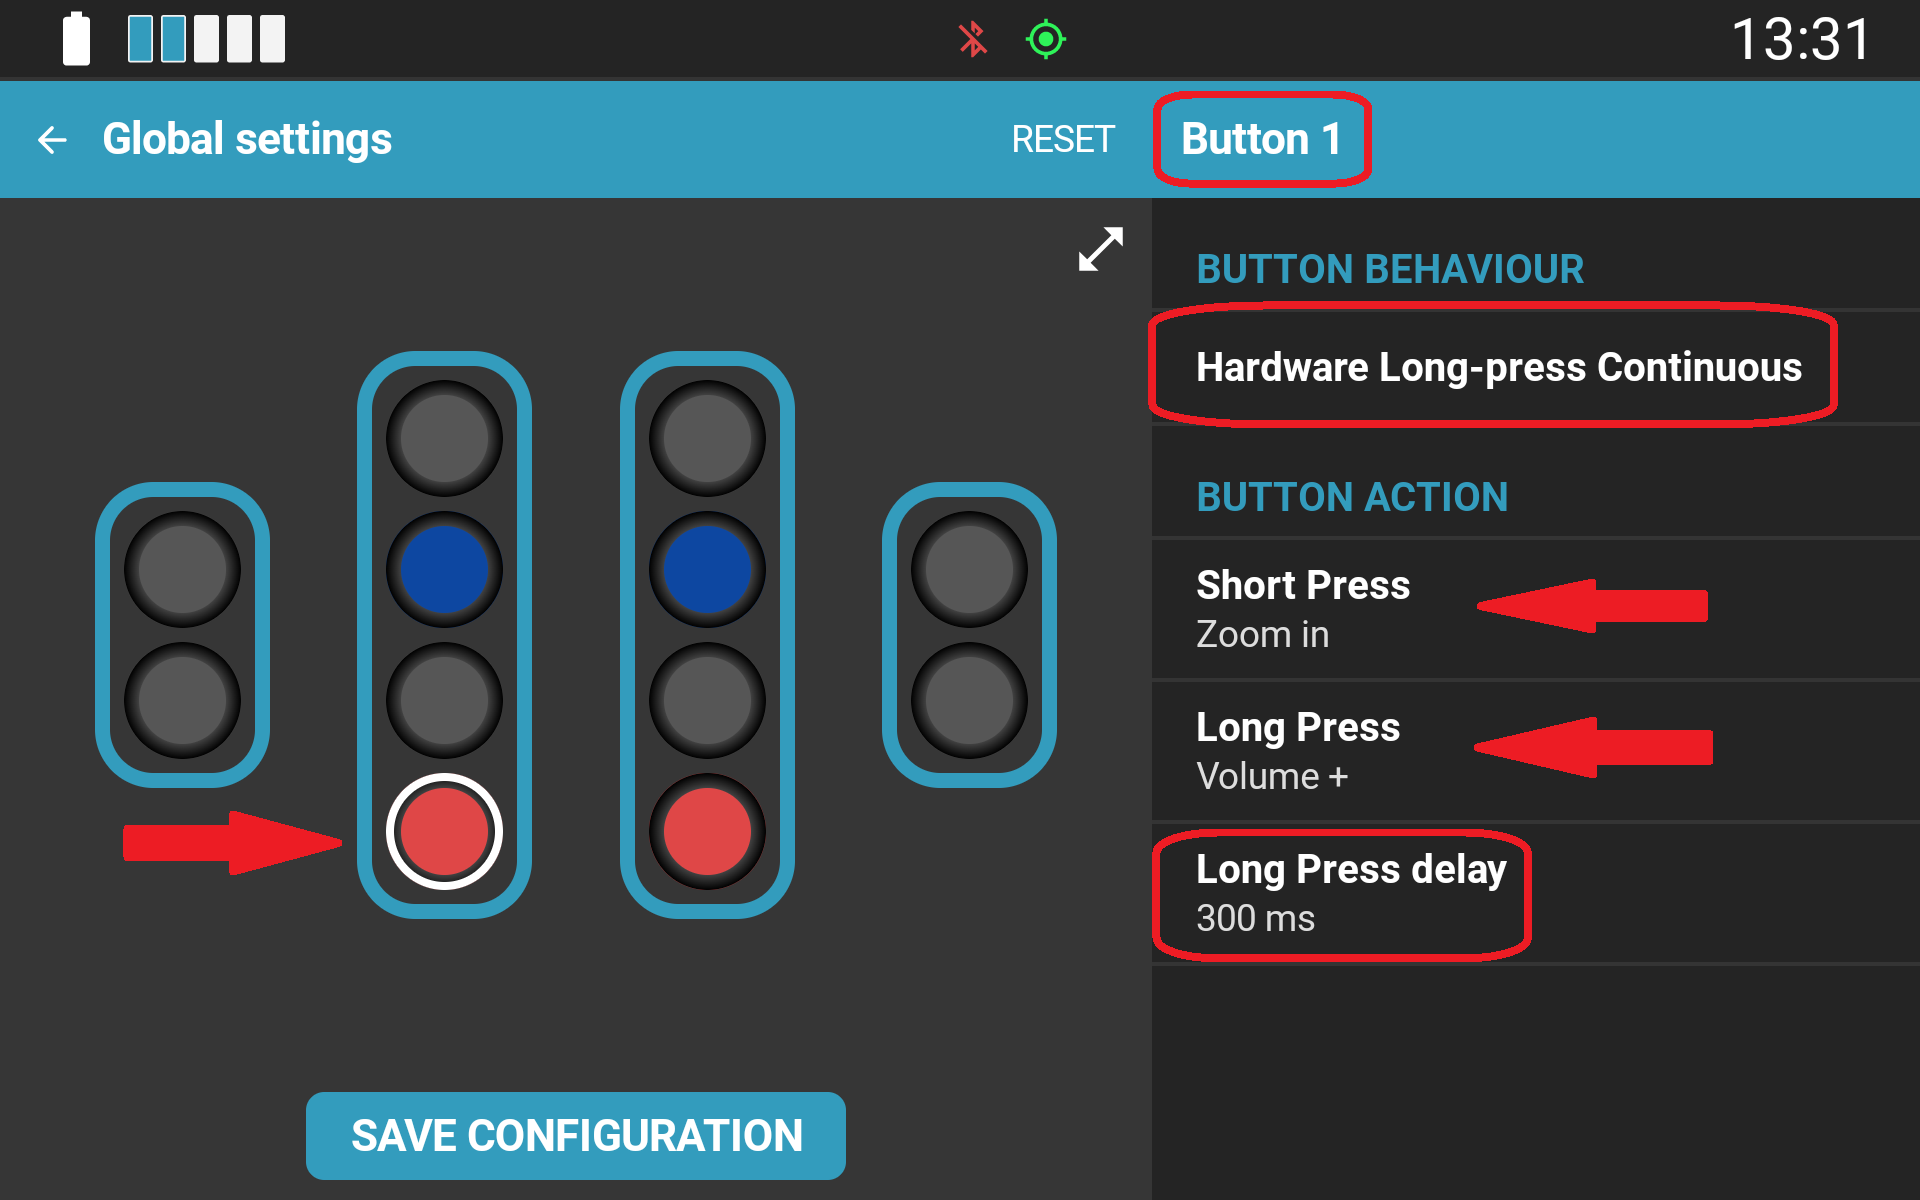
2. Hardware Button Behavior Configuration
You can also define how physical inputs respond to different press types:
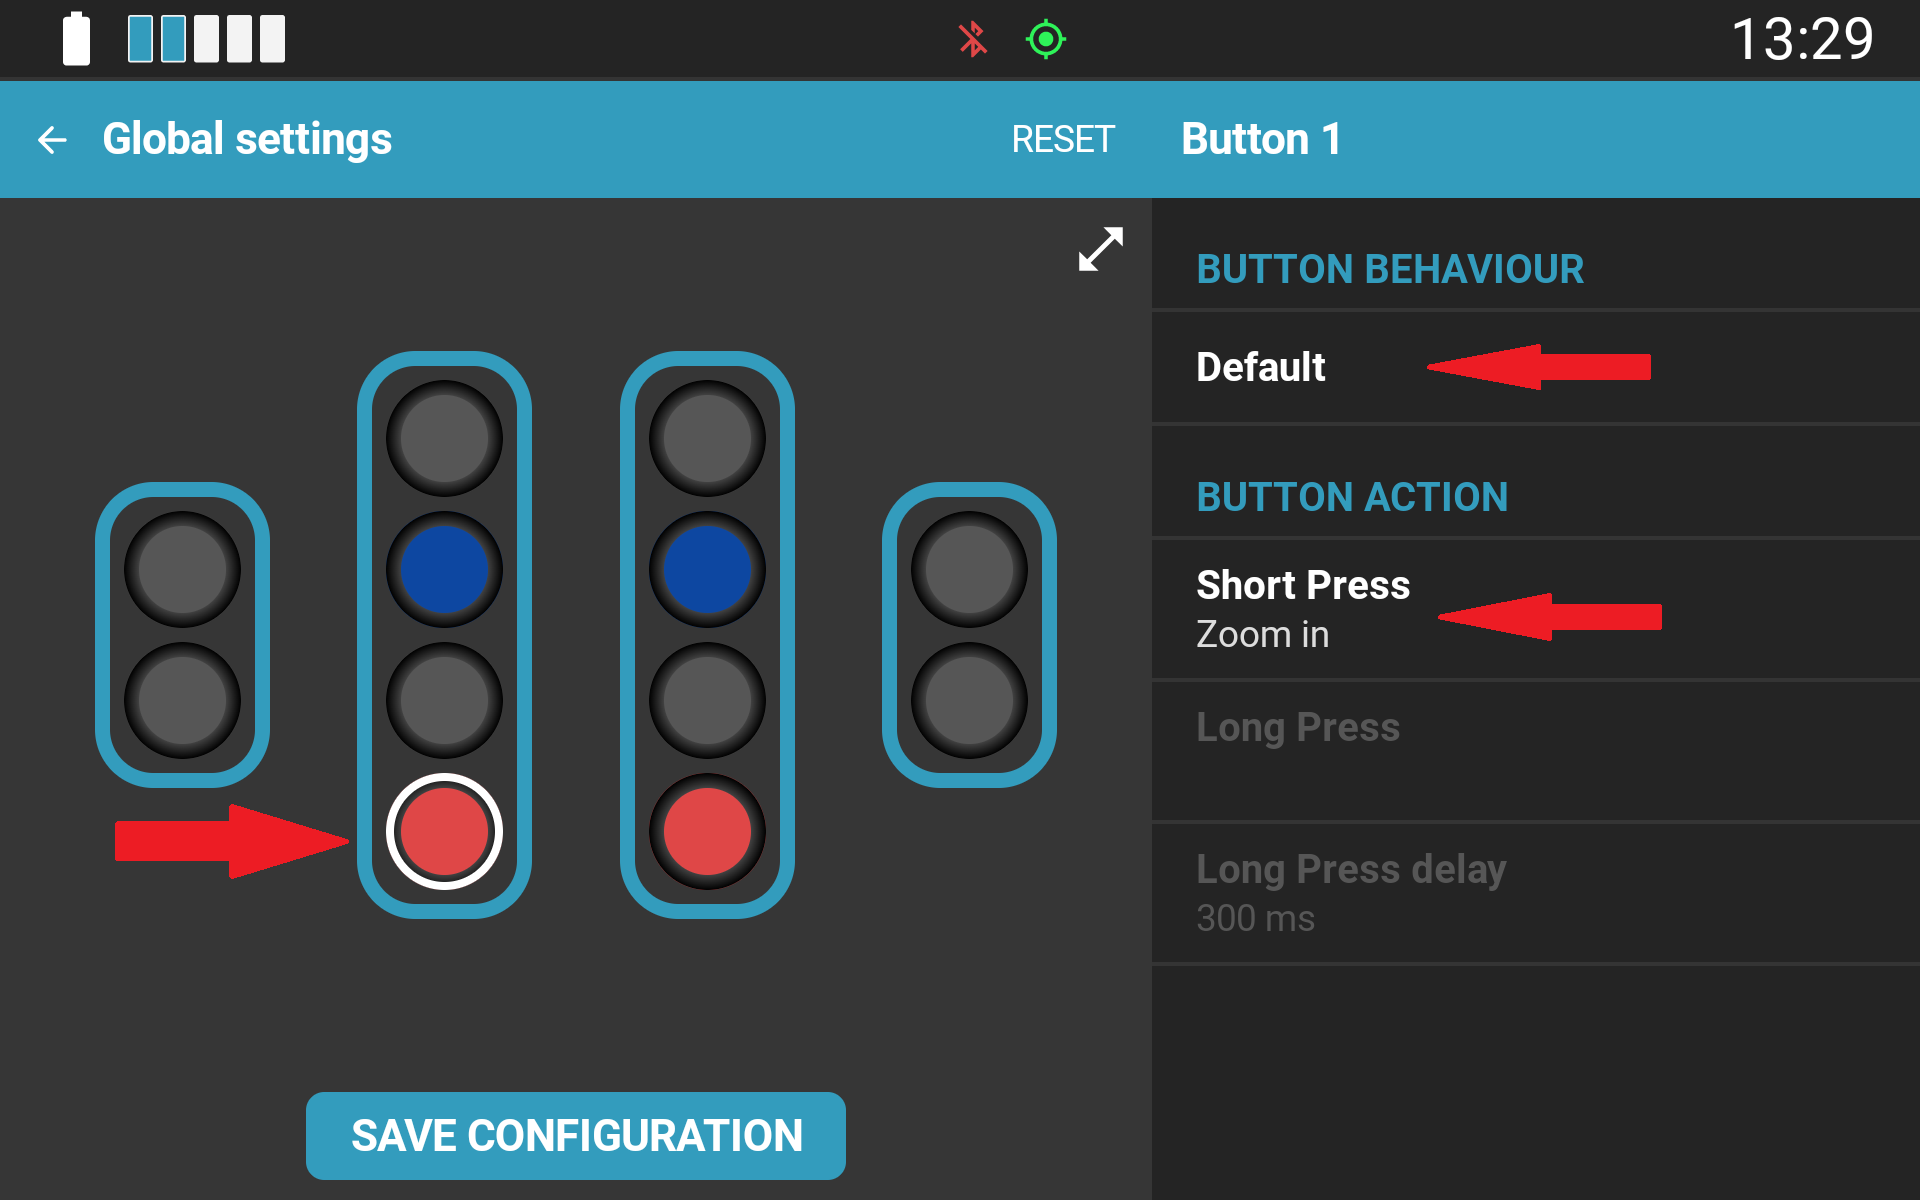
- Default: Functions like a standard keyboard key. The assigned command executes continuously for as long as the button remains pressed.
- Long-Press Single Action: Maps two distinct functions to a single input (one for short press, one for long press).
- Example: Short press = "Pan Map Up"; Long press = "Play Music".
- Behavior: The long-press action executes once per press event, preventing repeated triggers on toggle commands (such as Play/Pause).
- Long-Press Continuous: Maps two distinct functions to a single input, with the long press repeating continuously ("auto-fire") for as long as the button is held.
- Behavior: Ideal for functions requiring continuous adjustments, such as continuous map panning or rapid volume adjustment.
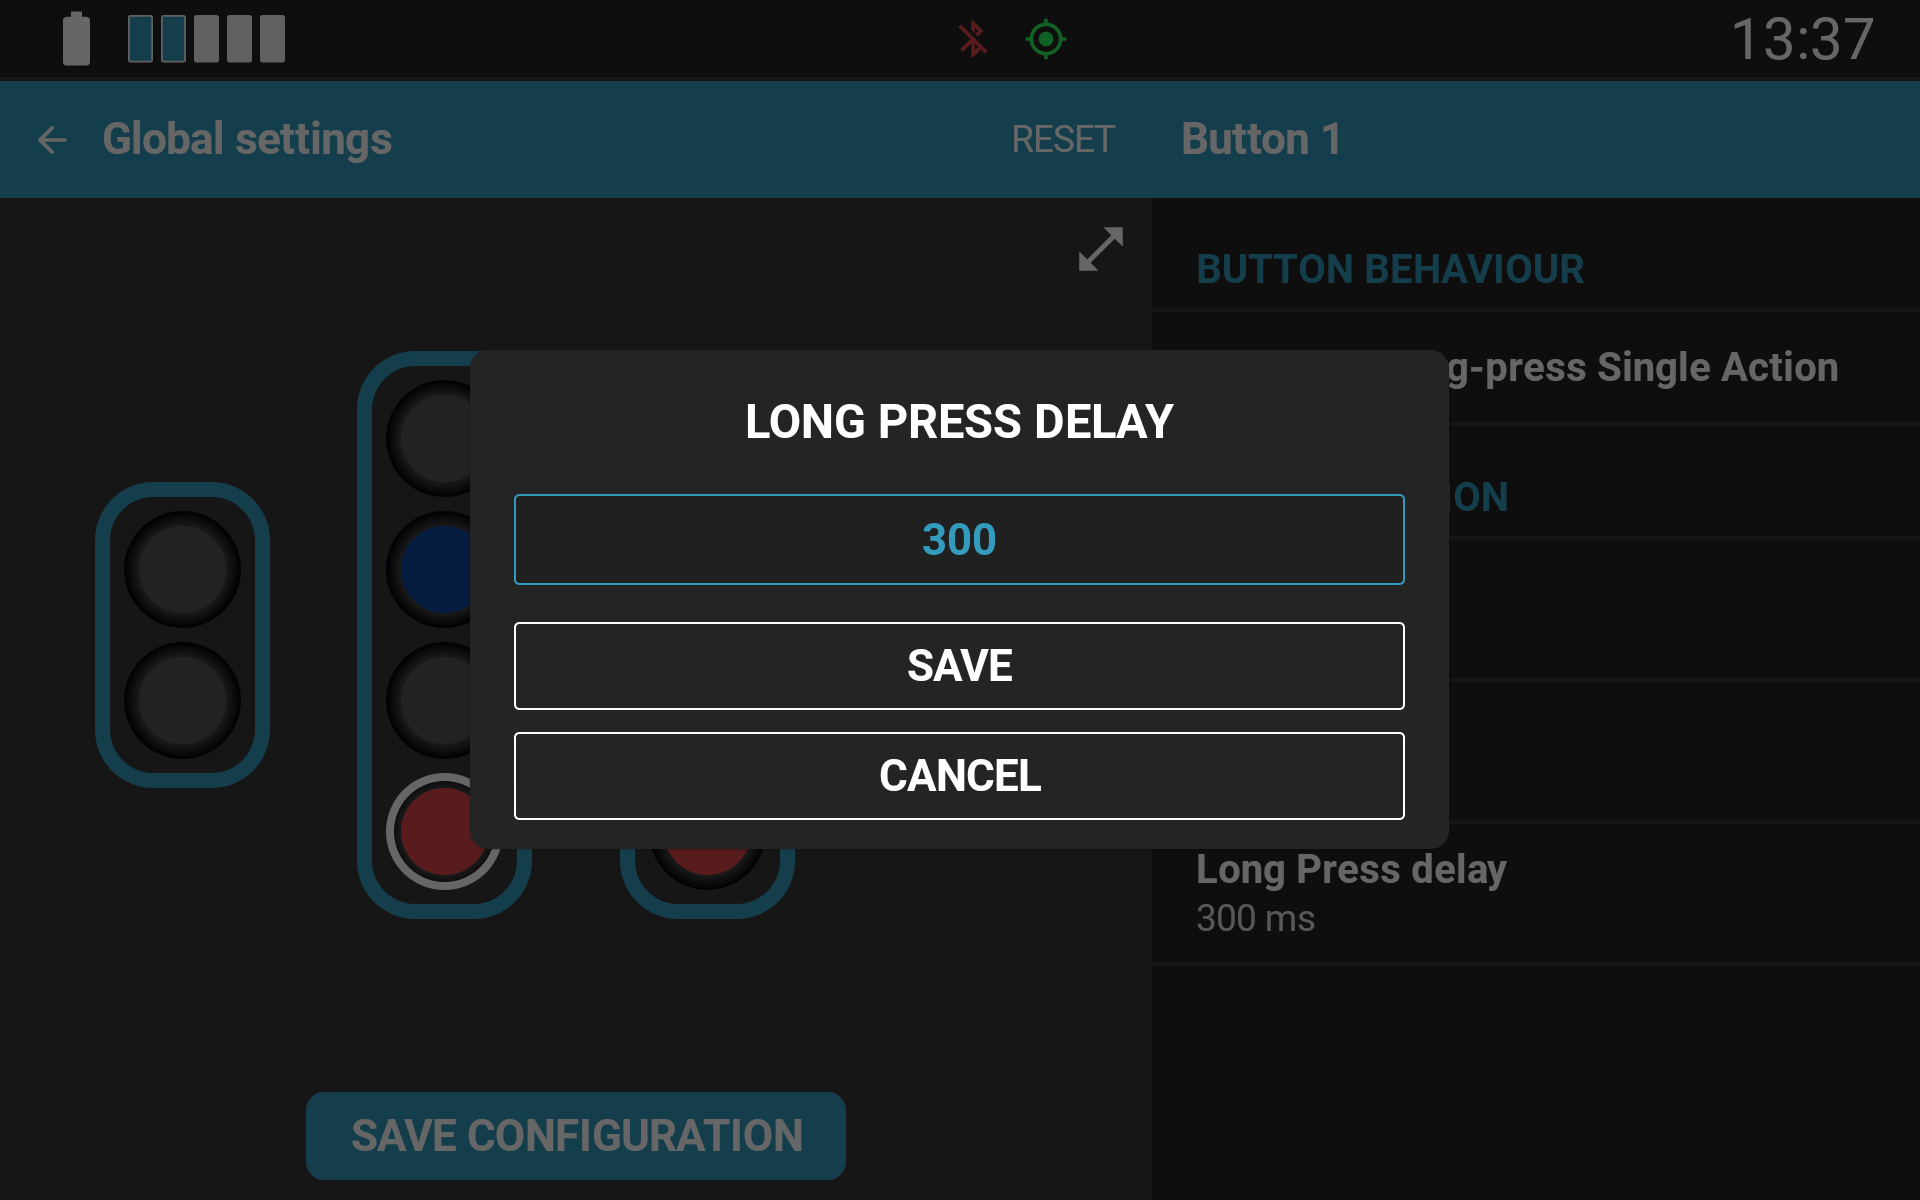
For long-press modes, the activation threshold (the duration required to register a long press) can be adjusted. The default duration is 300 ms.
Hardware button press configuration interface (Terrain Command III with Toggle Switches):
Certain controller models (notably the Terrain Command III) feature additional hardware-specific configuration parameters. For detailed hardware instructions, refer to the dedicated manual for your specific controller model in the Support Portal.
Was this article helpful?
That’s Great!
Thank you for your feedback
Sorry! We couldn't be helpful
Thank you for your feedback
Feedback sent
We appreciate your effort and will try to fix the article